Pipeline Customization
This tutorial goes over how to add custom file readers, quality control, and data converter code to tsdat for the pipeline-template. This tutorial builds off of first tutorial and utilizes the same example data.
We’ll dive straight into it by creating a new pipeline:
make cookies
Or
cookiecutter templates/ingest -o ingest/
And select yes (2) to the “Select use_custom_<option>” prompts.
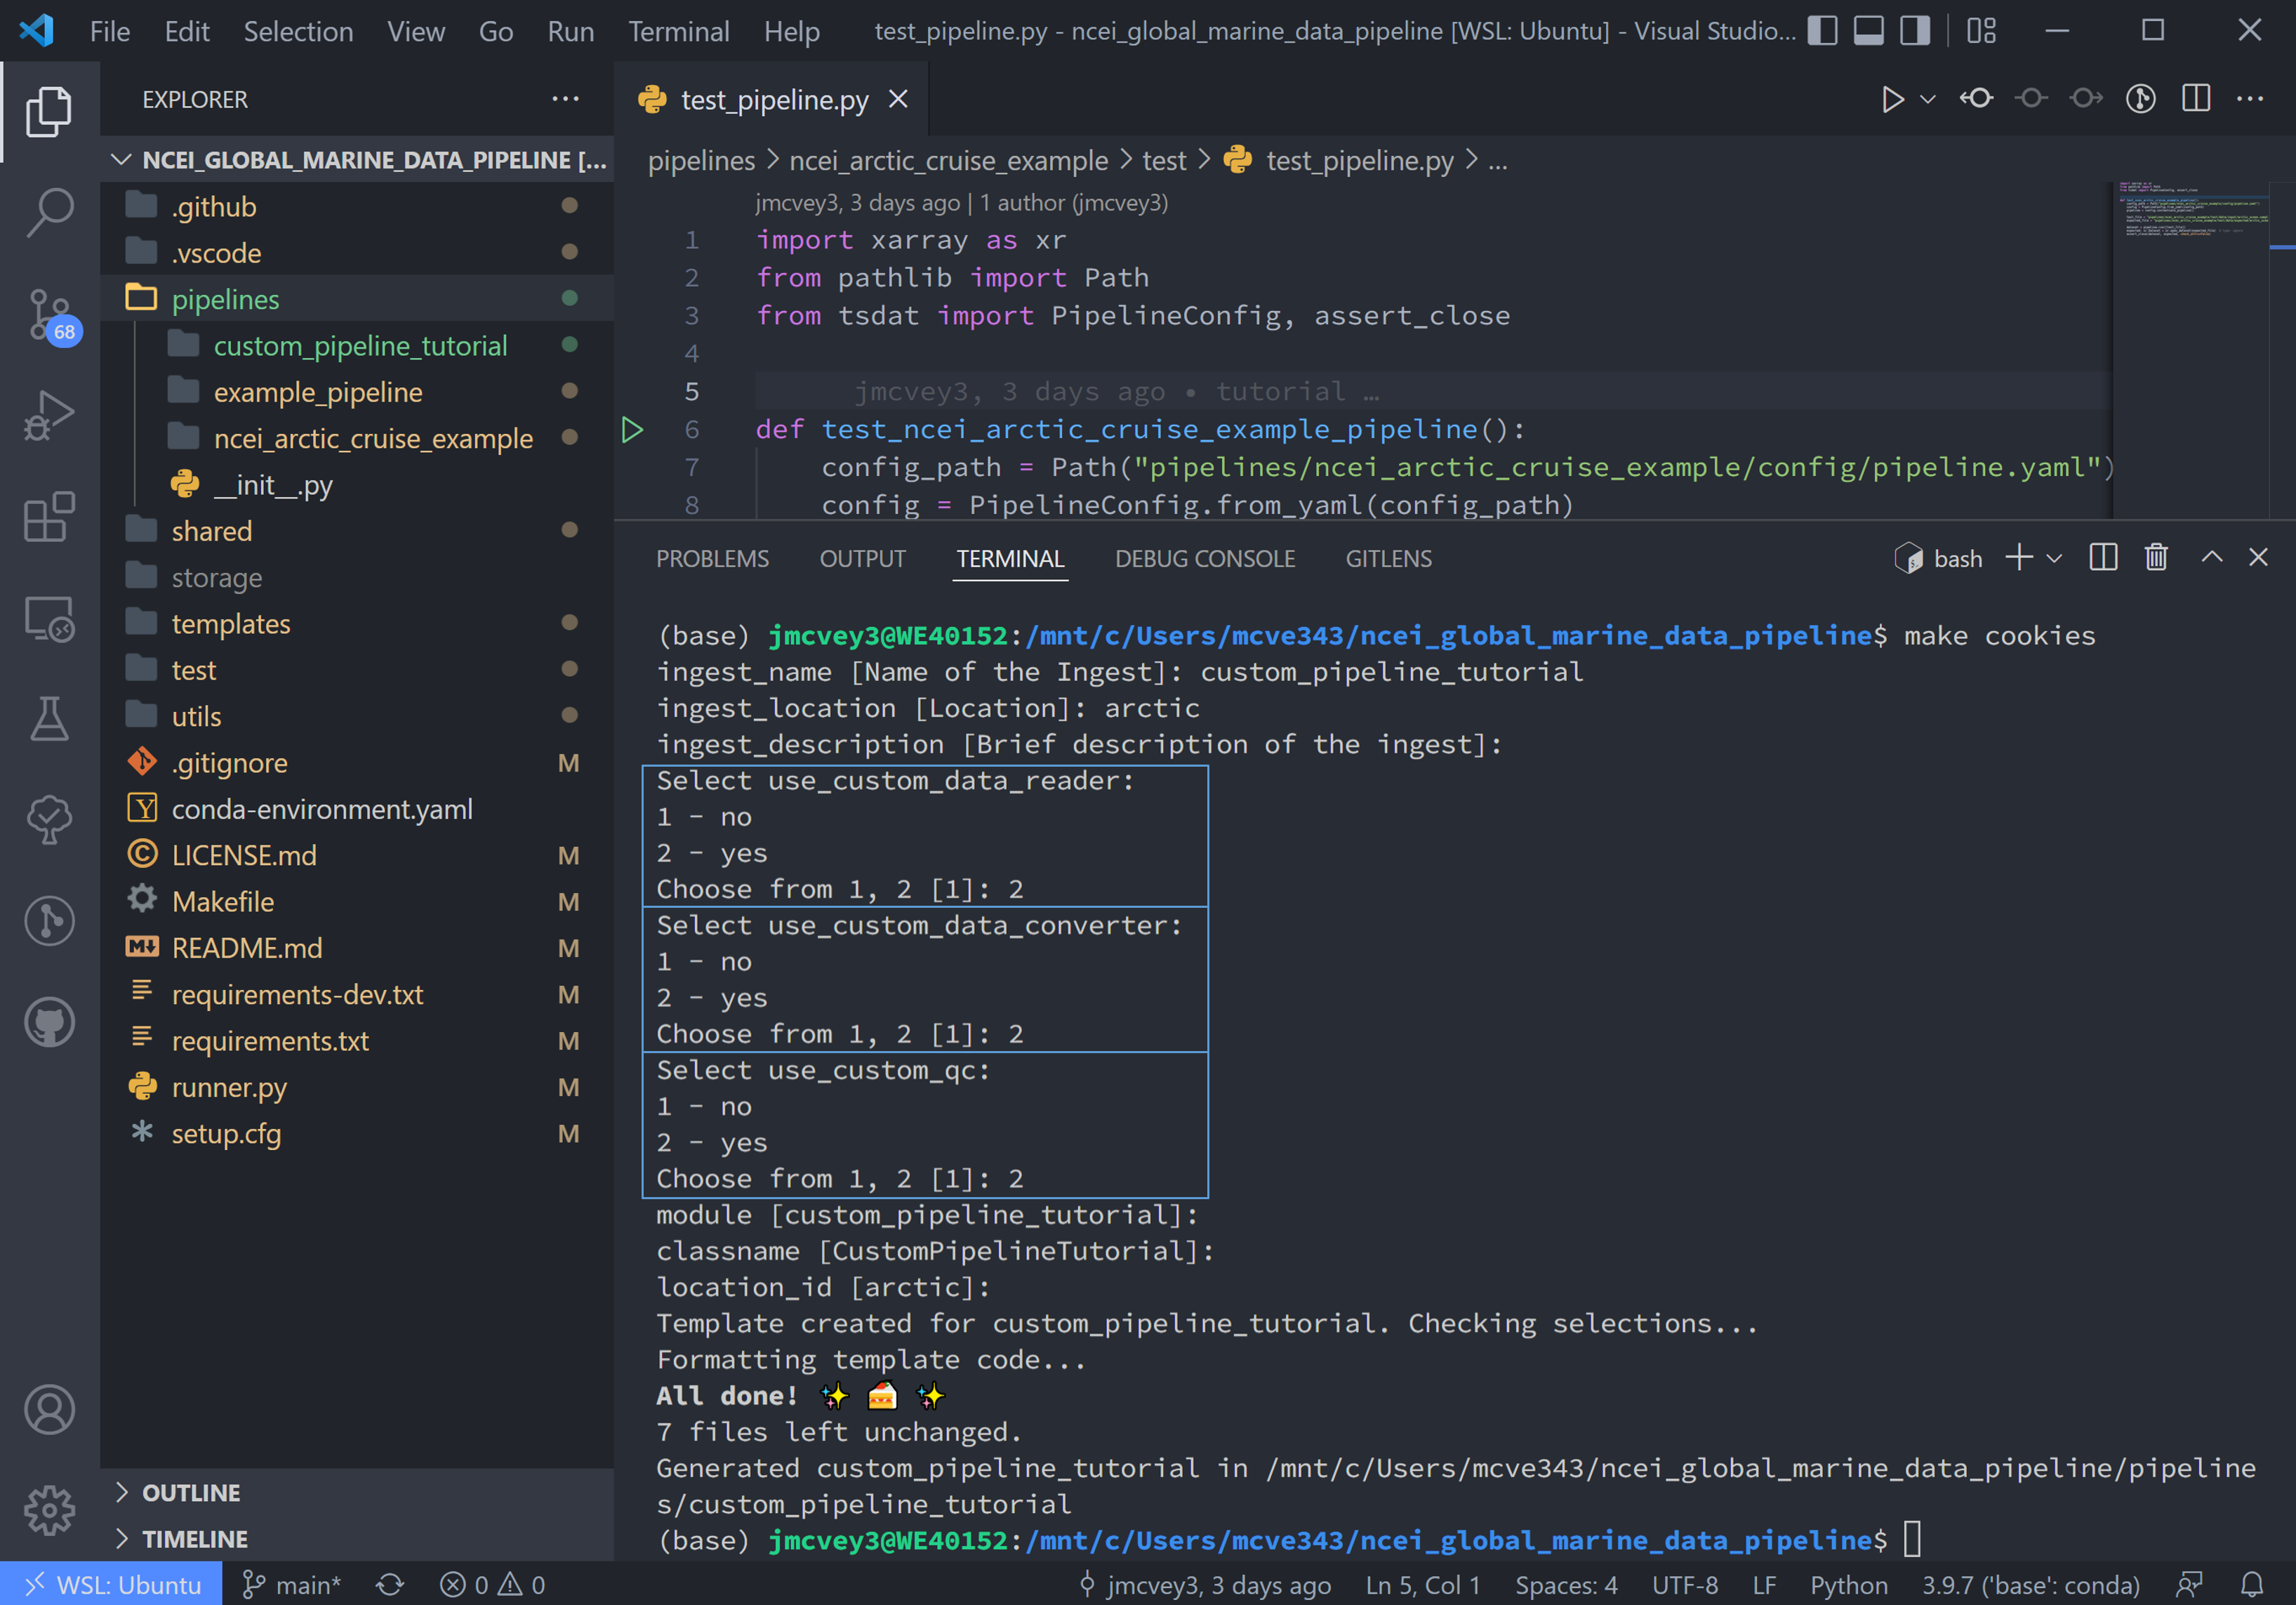
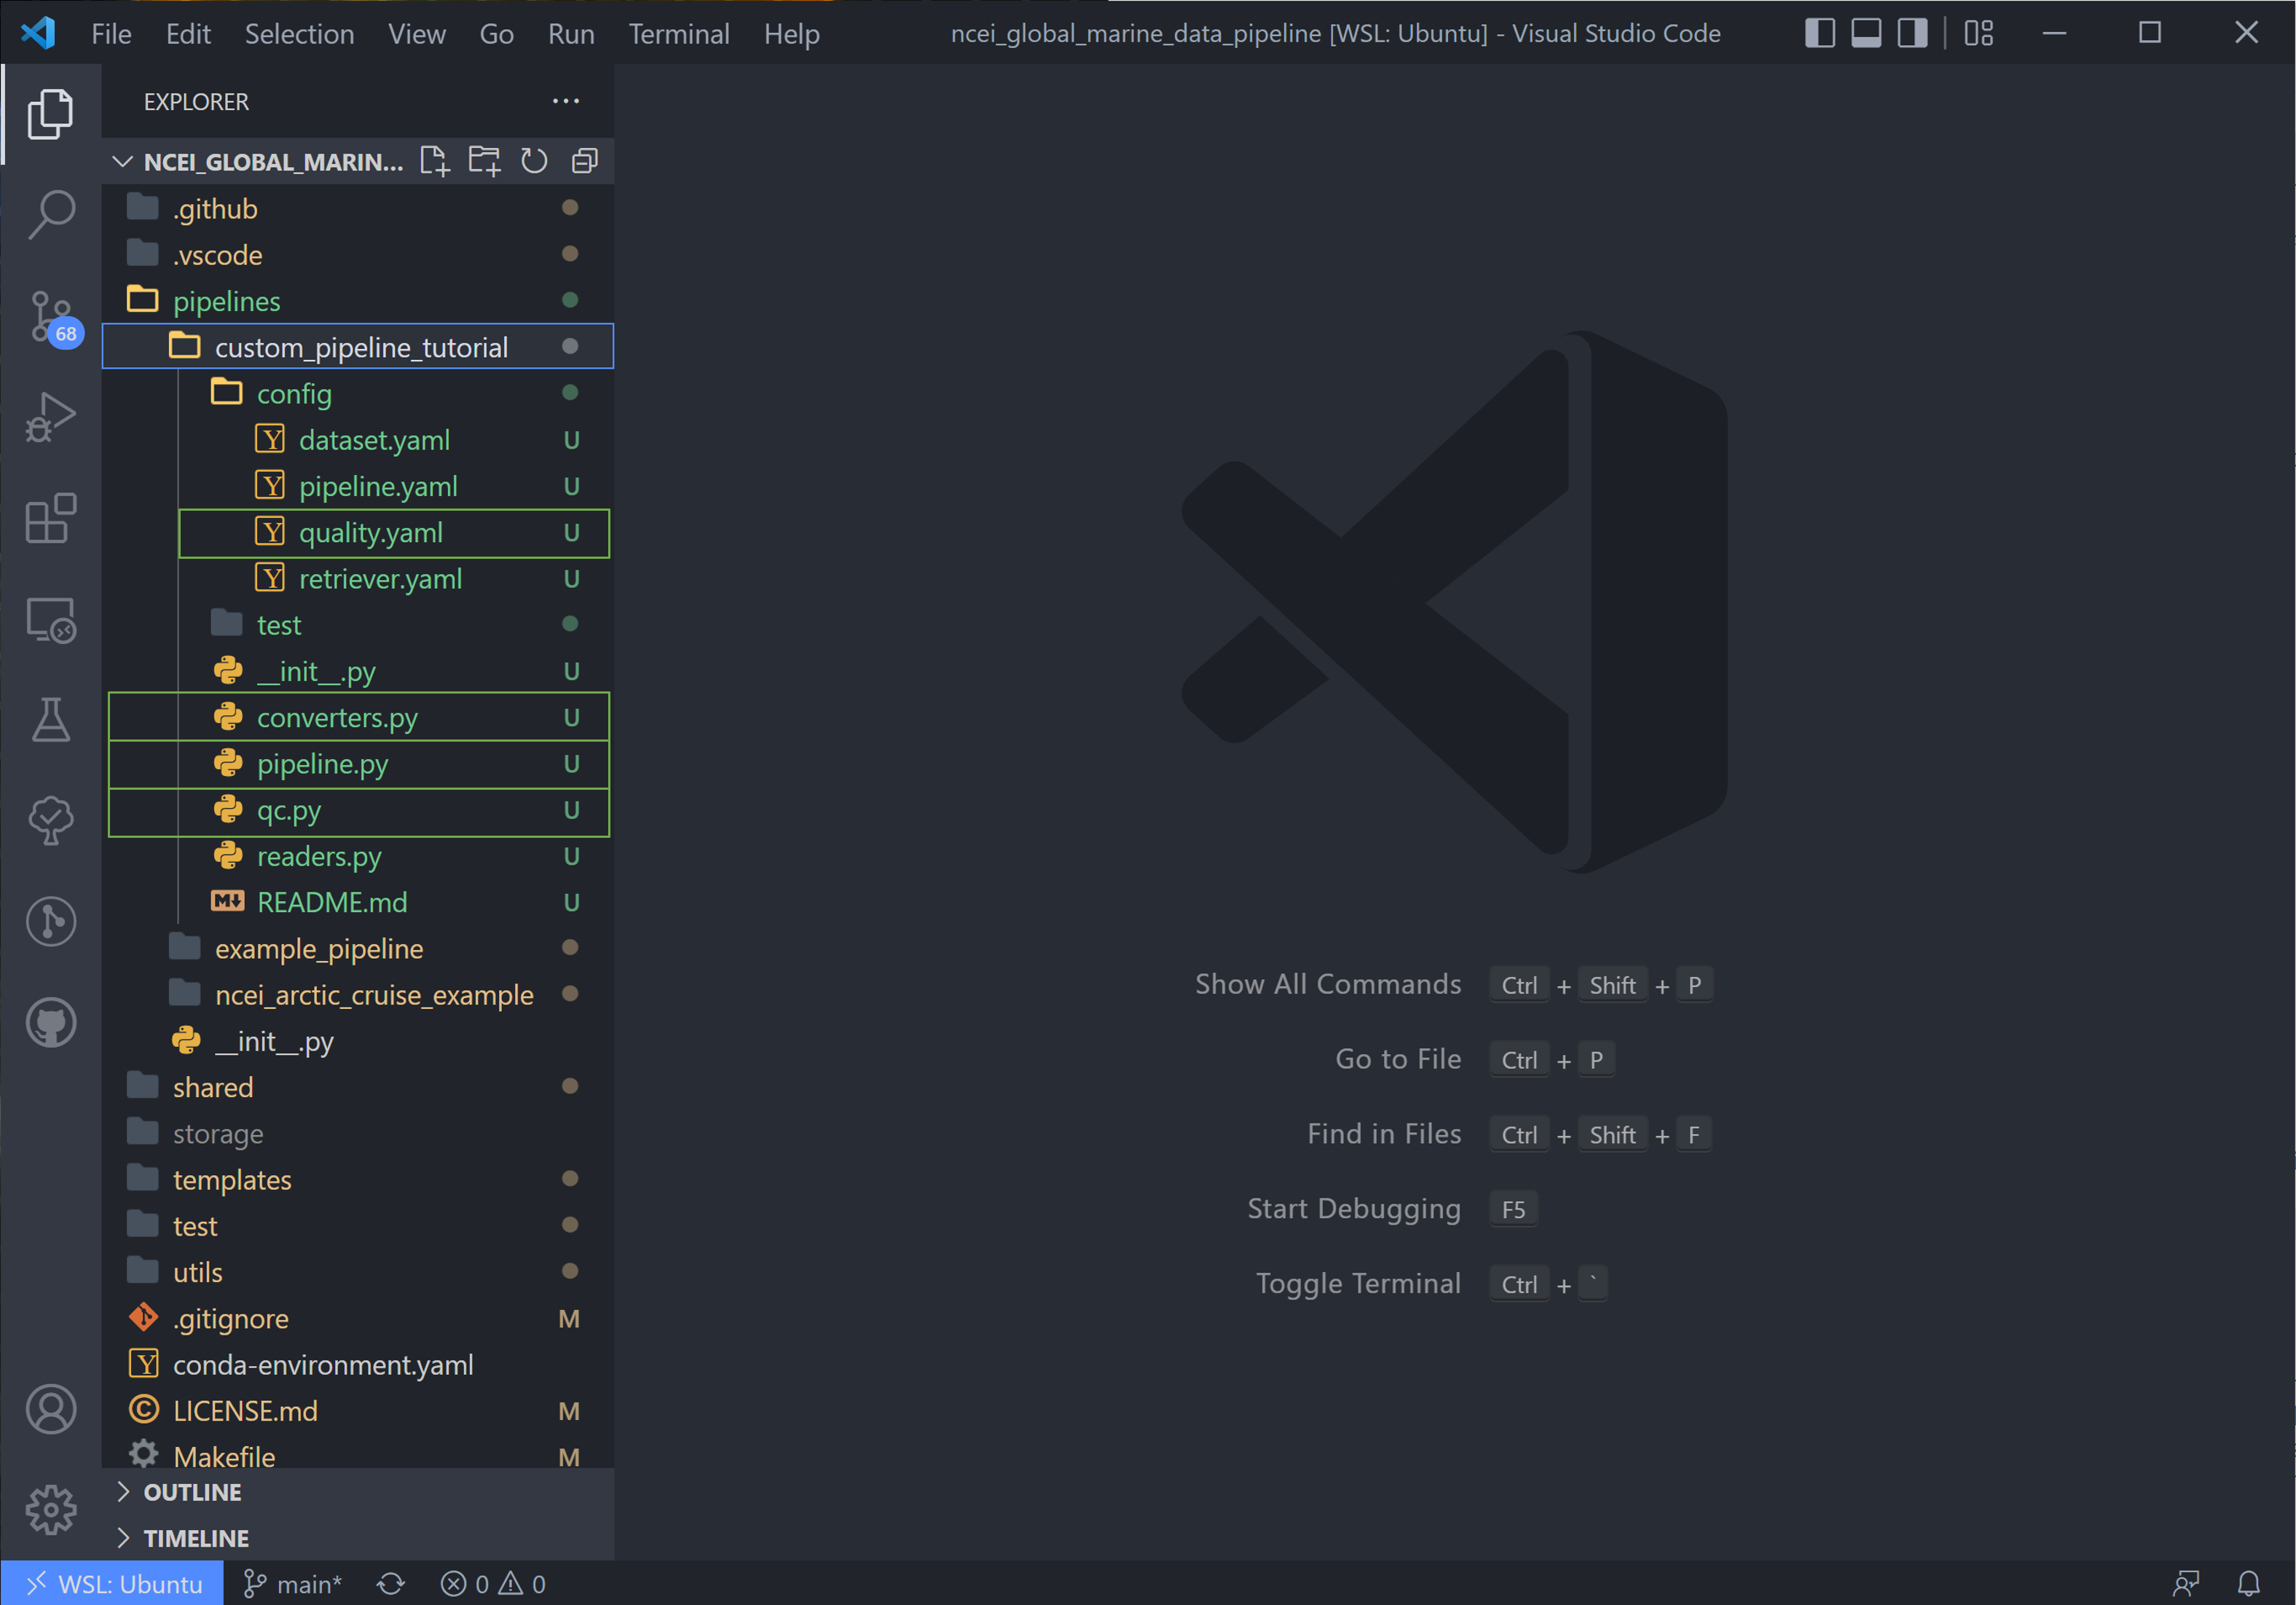
Notice this adds a readers.py, qc.py, and converters.py to the new pipeline directory, as well as a qc.yaml file to the config folder.
Fill out the Configuration Files
2. Go ahead and copy the retriever.yaml, dataset.yaml, and pipeline.py files from the NOAA NCEI example data tutorial if you using that data. If you are building a custom pipeline, go ahead and fill out these files now.
Adding a Custom File Reader
Tsdat has two native file readers: CSVReader and NetCDFReader. While useful
for a number of input files, it is not uncommon for raw data files to be saved
in some custom format or structure. Tsdat has the flexibility to incorporate
user-built code to read and pre-process raw data.
It is recommended to test your code before inputting to tsdat’s framework by first writing and testing a reader on your input data in your preferred IDE. This read function should return an xarray Dataset.
3. Since we’re using the same NOAA NCEI data as before, this tutorial with recreate tsdat’s csv reader from the user’s standpoint:
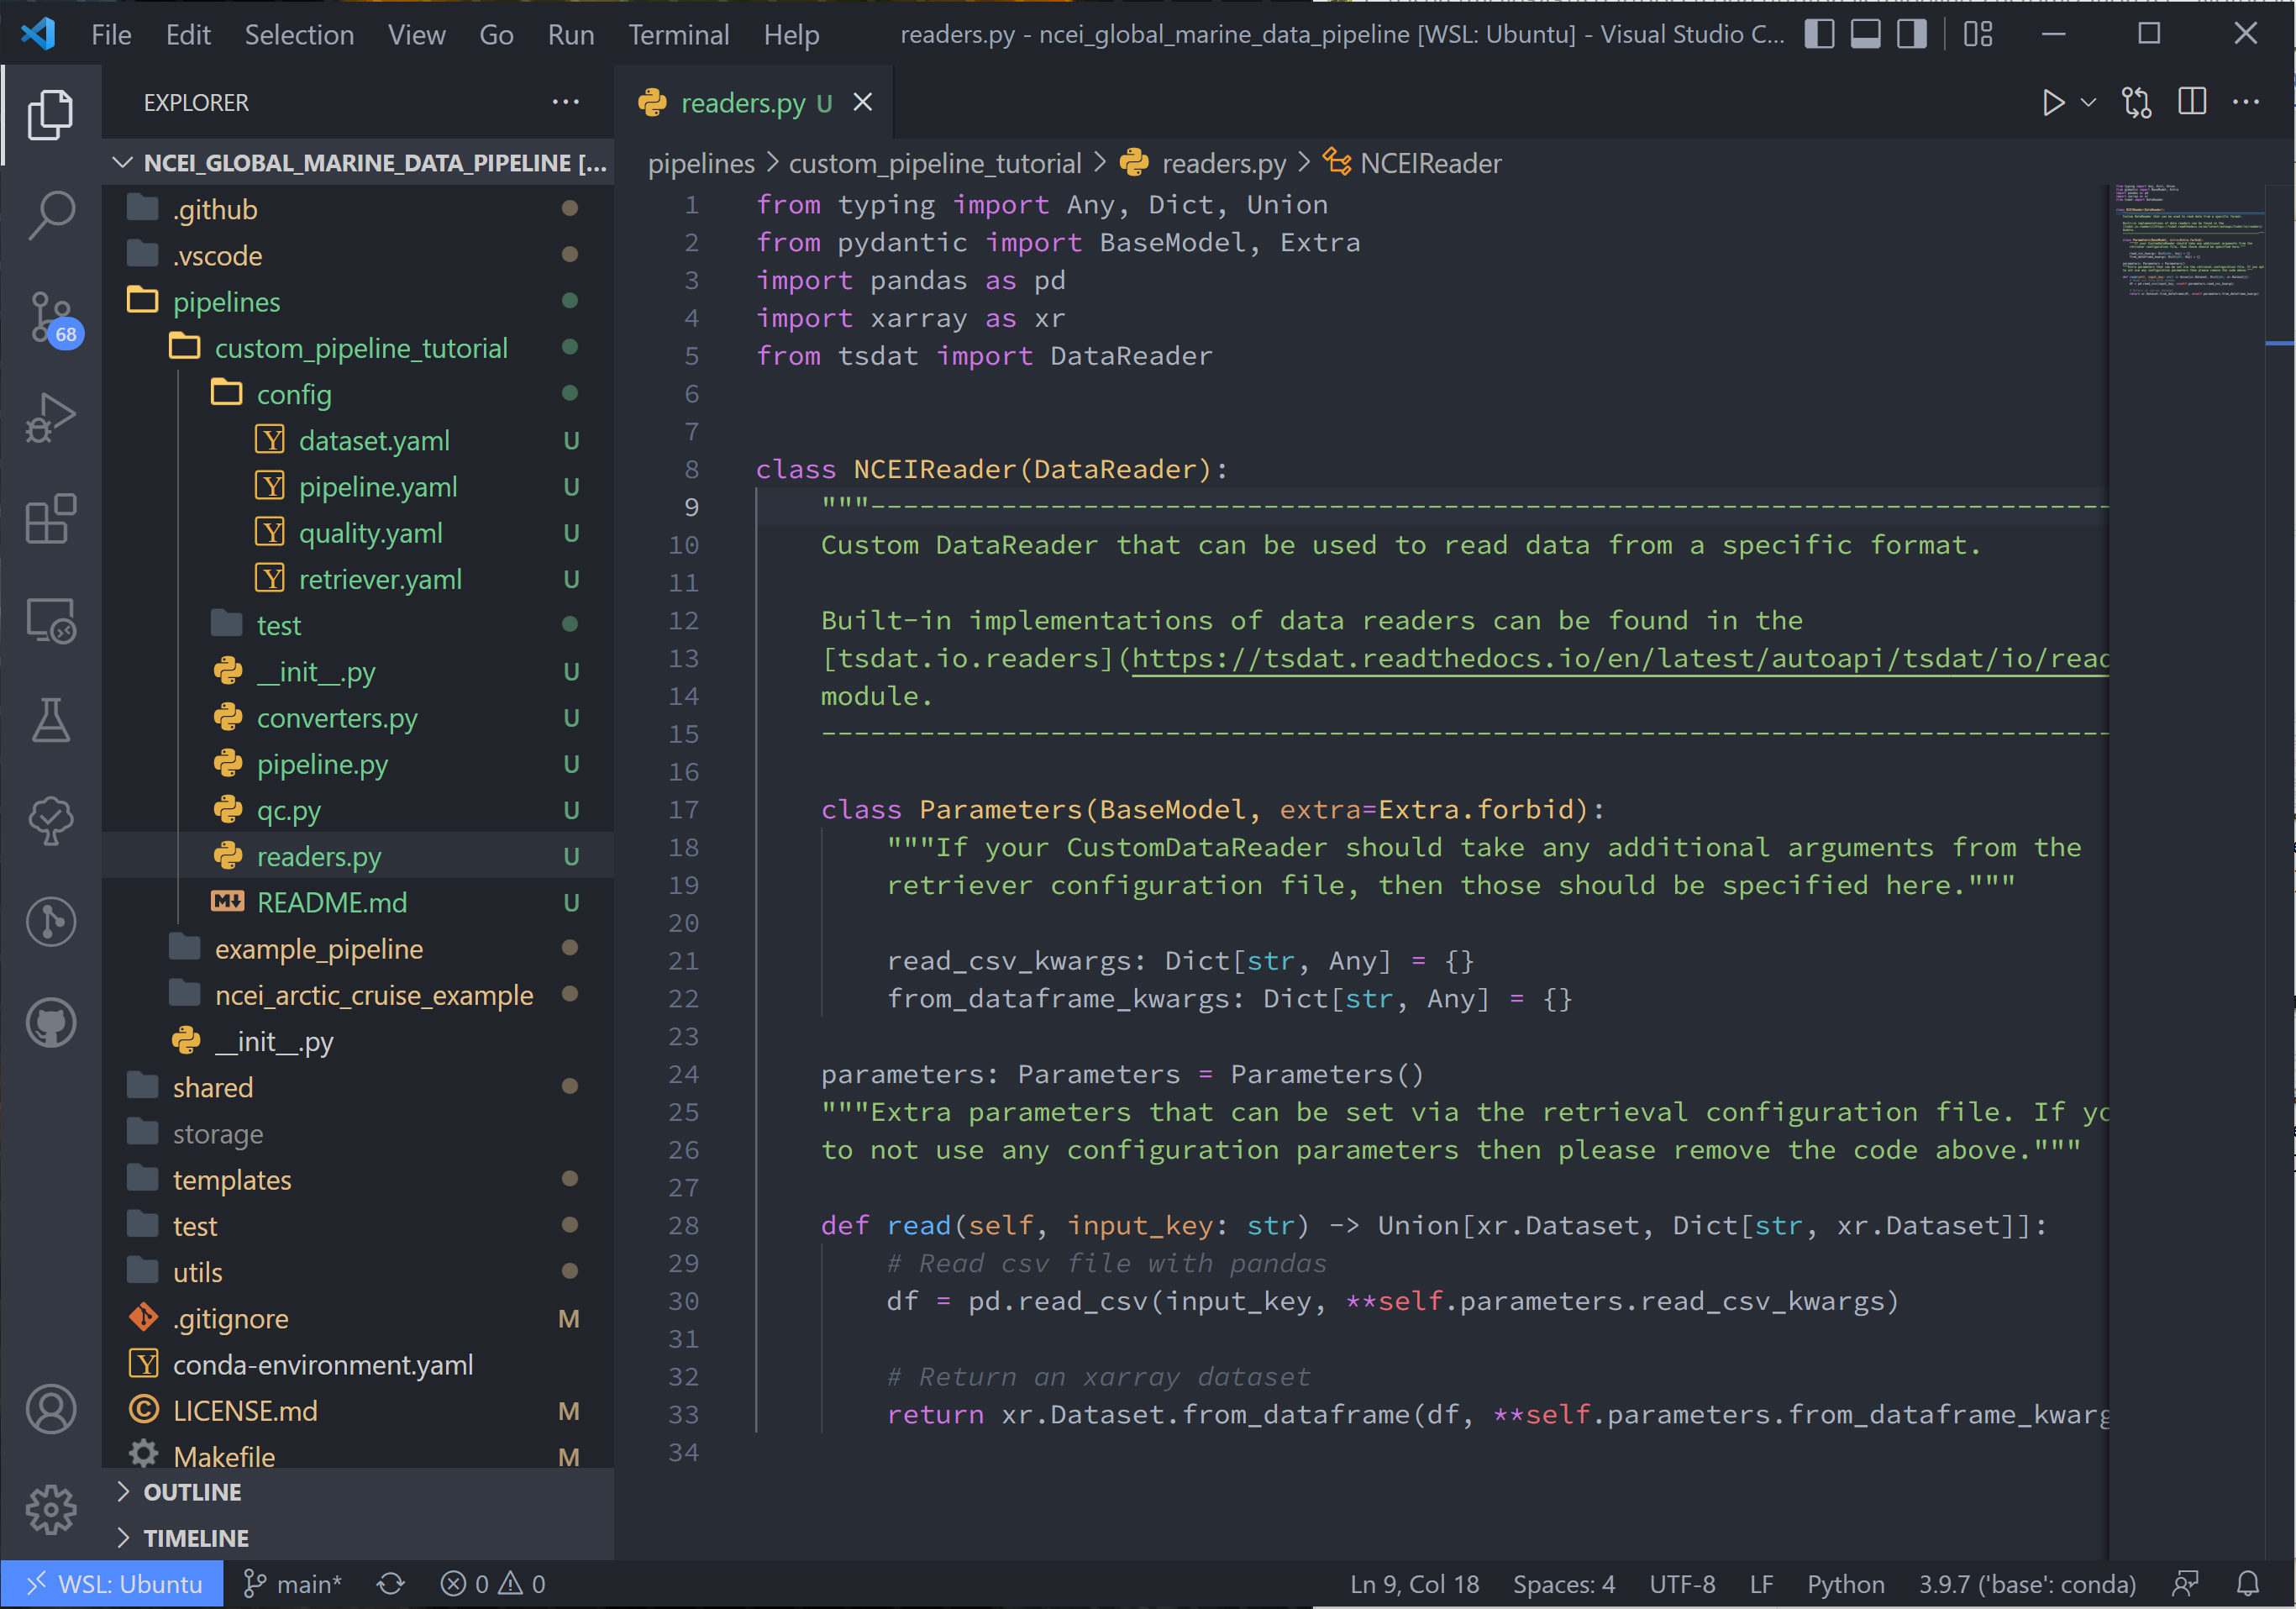
from typing import Any, Dict, Union
from pydantic import BaseModel, Extra
import pandas as pd
import xarray as xr
from tsdat import DataReader


class NCEIReader(DataReader):
    """---------------------------------------------------------------------------------
    Custom DataReader that can be used to read data from a specific format.

    Built-in implementations of data readers can be found in the
    [tsdat.io.readers](https://tsdat.readthedocs.io/en/latest/autoapi/tsdat/io/readers)
    module.
    ---------------------------------------------------------------------------------"""

    class Parameters(BaseModel, extra=Extra.forbid):
        """If your CustomDataReader should take any additional arguments from the
        retriever configuration file, then those should be specified here."""

        read_csv_kwargs: Dict[str, Any] = {}
        from_dataframe_kwargs: Dict[str, Any] = {}

    parameters: Parameters = Parameters()
    """Extra parameters that can be set via the retrieval configuration file. If you opt
    to not use any configuration parameters then please remove the code above."""

    def read(self, input_key: str) -> Union[xr.Dataset, Dict[str, xr.Dataset]]:
        # Read csv file with pandas
        df = pd.read_csv(input_key, **self.parameters.read_csv_kwargs)

        # Return an xarray dataset
        return xr.Dataset.from_dataframe(df, **self.parameters.from_dataframe_kwargs)
As you can see in the above code, our reader is contained by the class NCEIReader. The Parameters class initiates the parameters expected from the retriever.yaml file, which are then fed to the “read” function, which contains the reader’s source code.
Note, after running the reader, the pipeline runs the dataset through the retriever. If variable names are changed in the reader source code, this change should be reflected in the vairables’ input names in retriever.yaml.
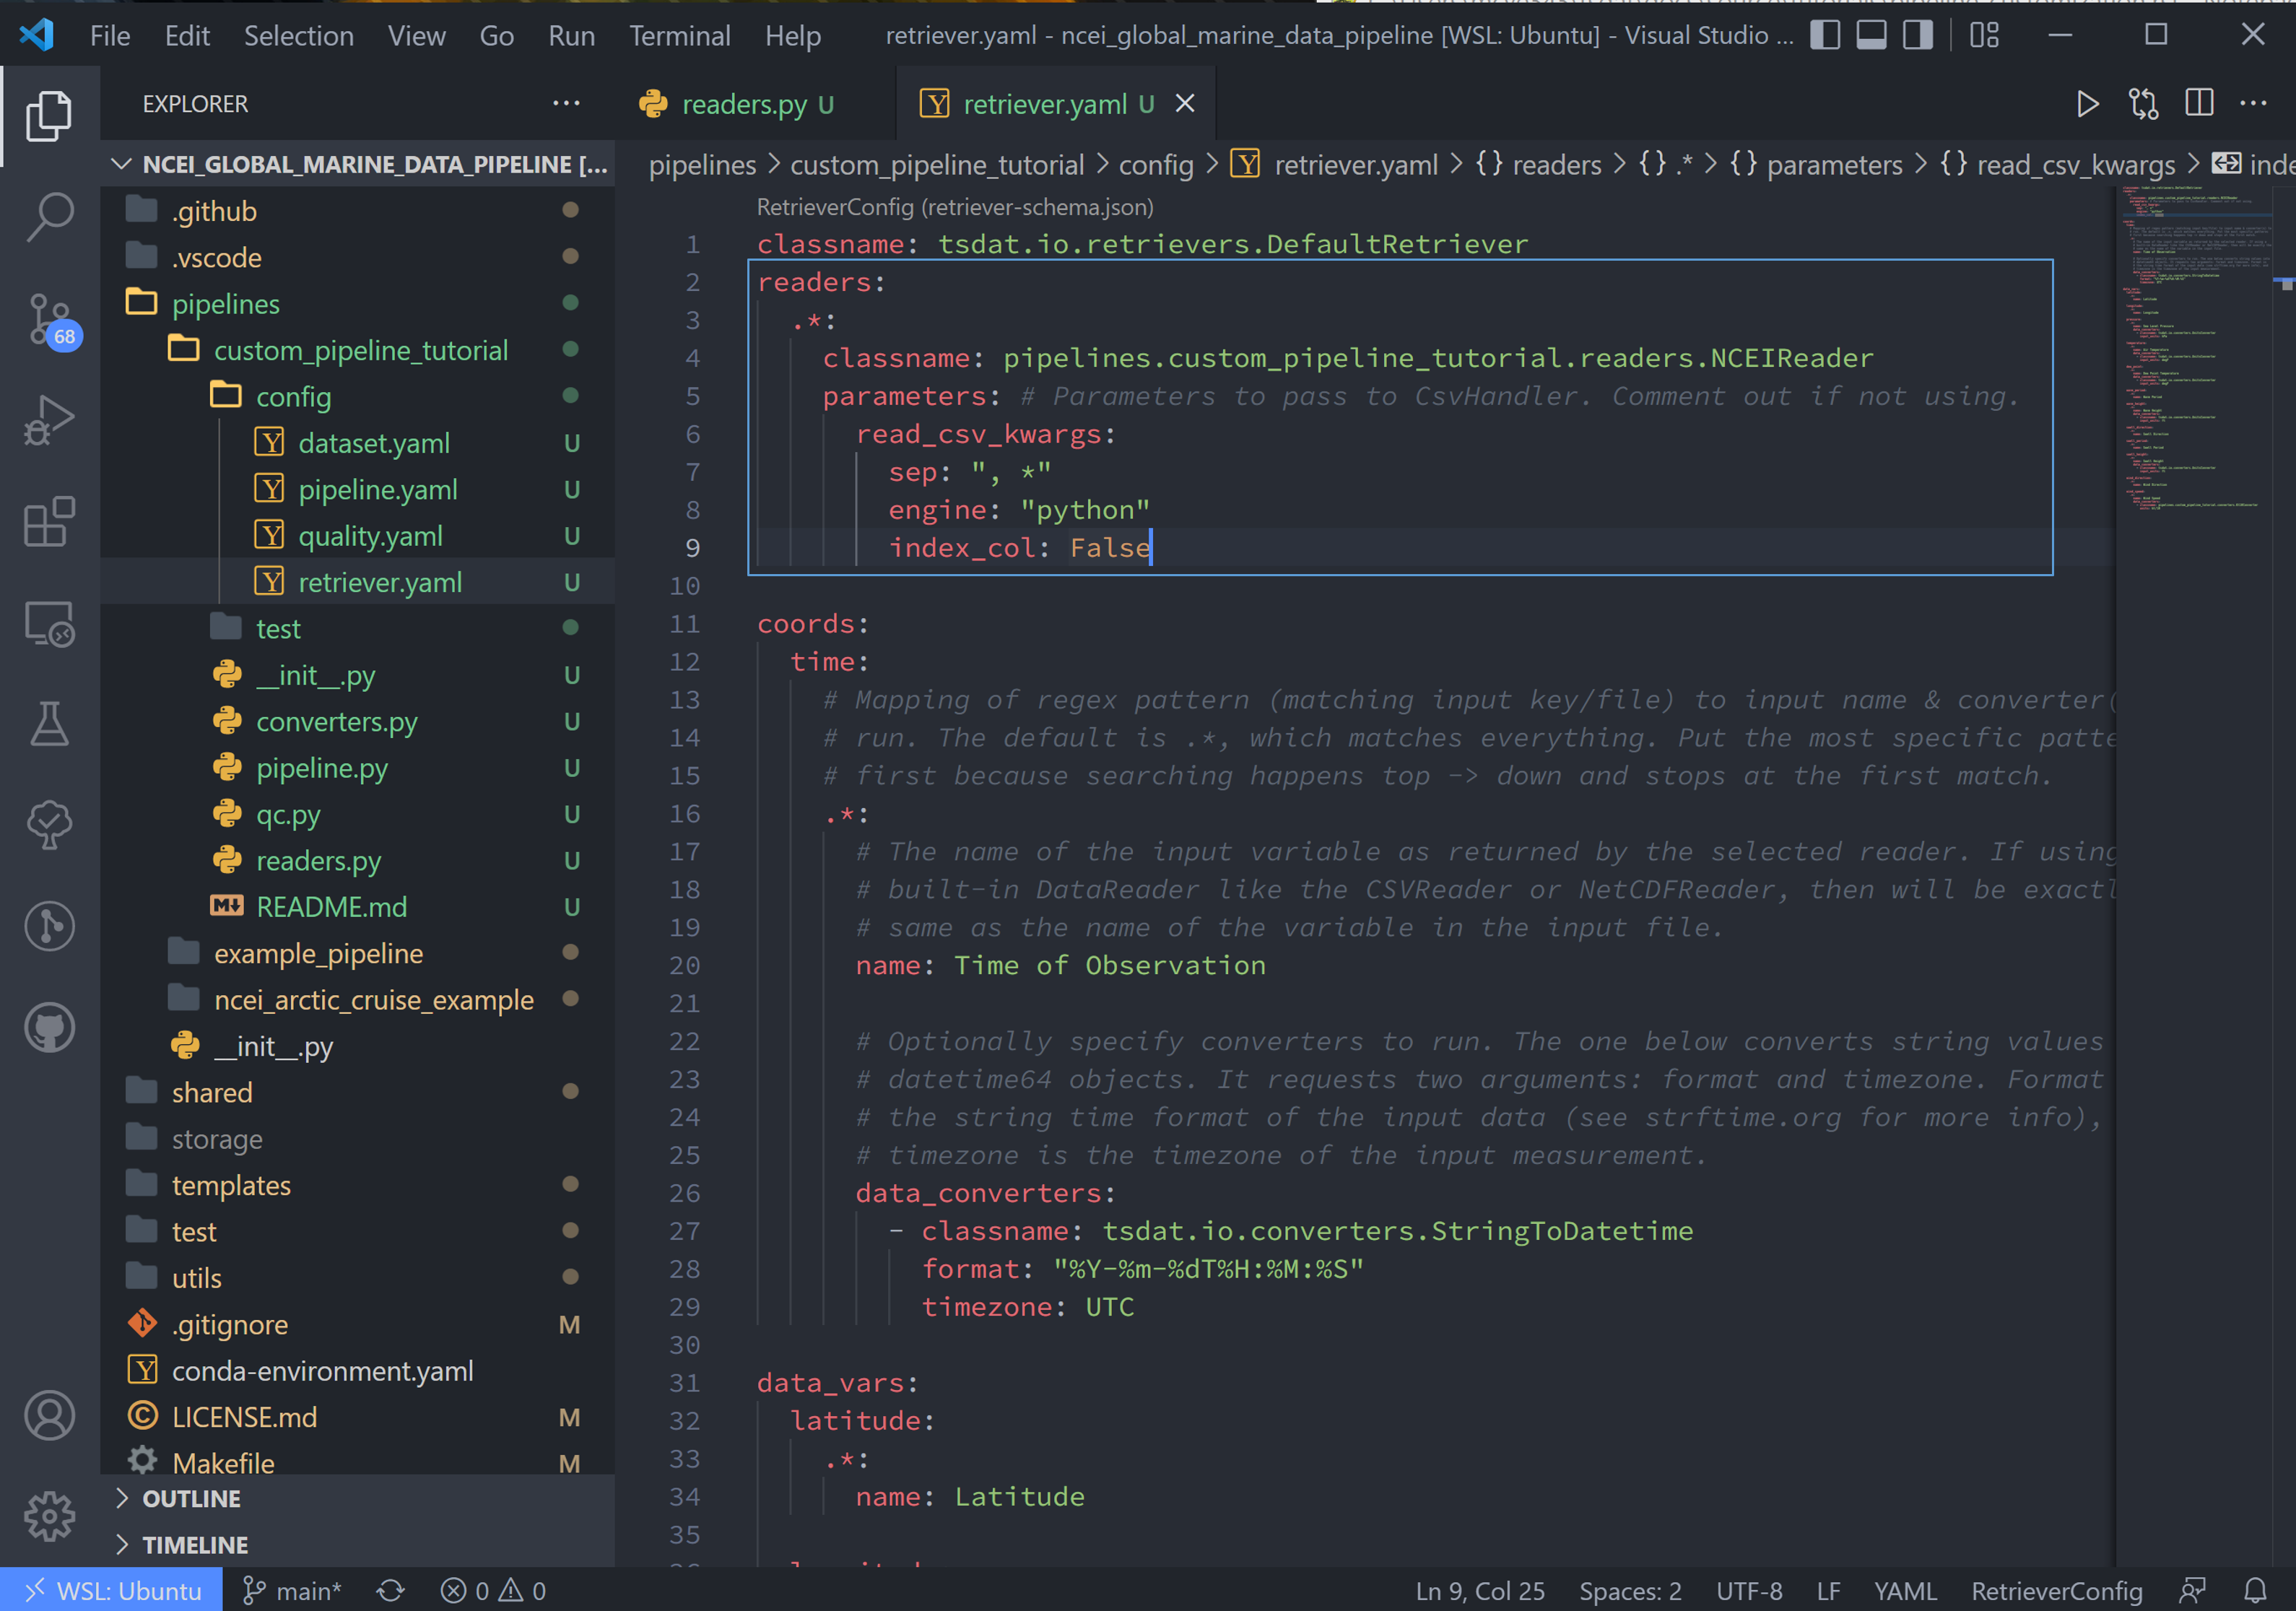
4. We now need to tell tsdat now to use our csv file reader. Open the retriever.yaml file and replace the reader block with (remember to replace <pipeline_name> with your own pipeline’s name):
readers:
  .*:
    classname: pipelines.<pipeline_name>.readers.NCEIReader
    parameters:
      read_csv_kwargs:
        sep: ", *"
        engine: "python"
        index_col: False
Notice we are not using the “from_dataframe_kwargs”, but if we were, “from_dataframe_kwargs” would be listed at the same indent level as “read_csv_kwargs”.
Adding Custom Data Converter Functions
Tsdat has two native data converters, a UnitsConverter and a StringToDatetime
converter. These provide the useful functions of converting units and utilizing
the datetime package’s ability to read time formats, given the correct timestring.
The custom data converter is an option to add pre-processing to specific variables in the input dataset, while a custom file reader gives more flexibility to cover all at once. Converters operate on a variable-by-variable basis, so keep this in mind when adding one.
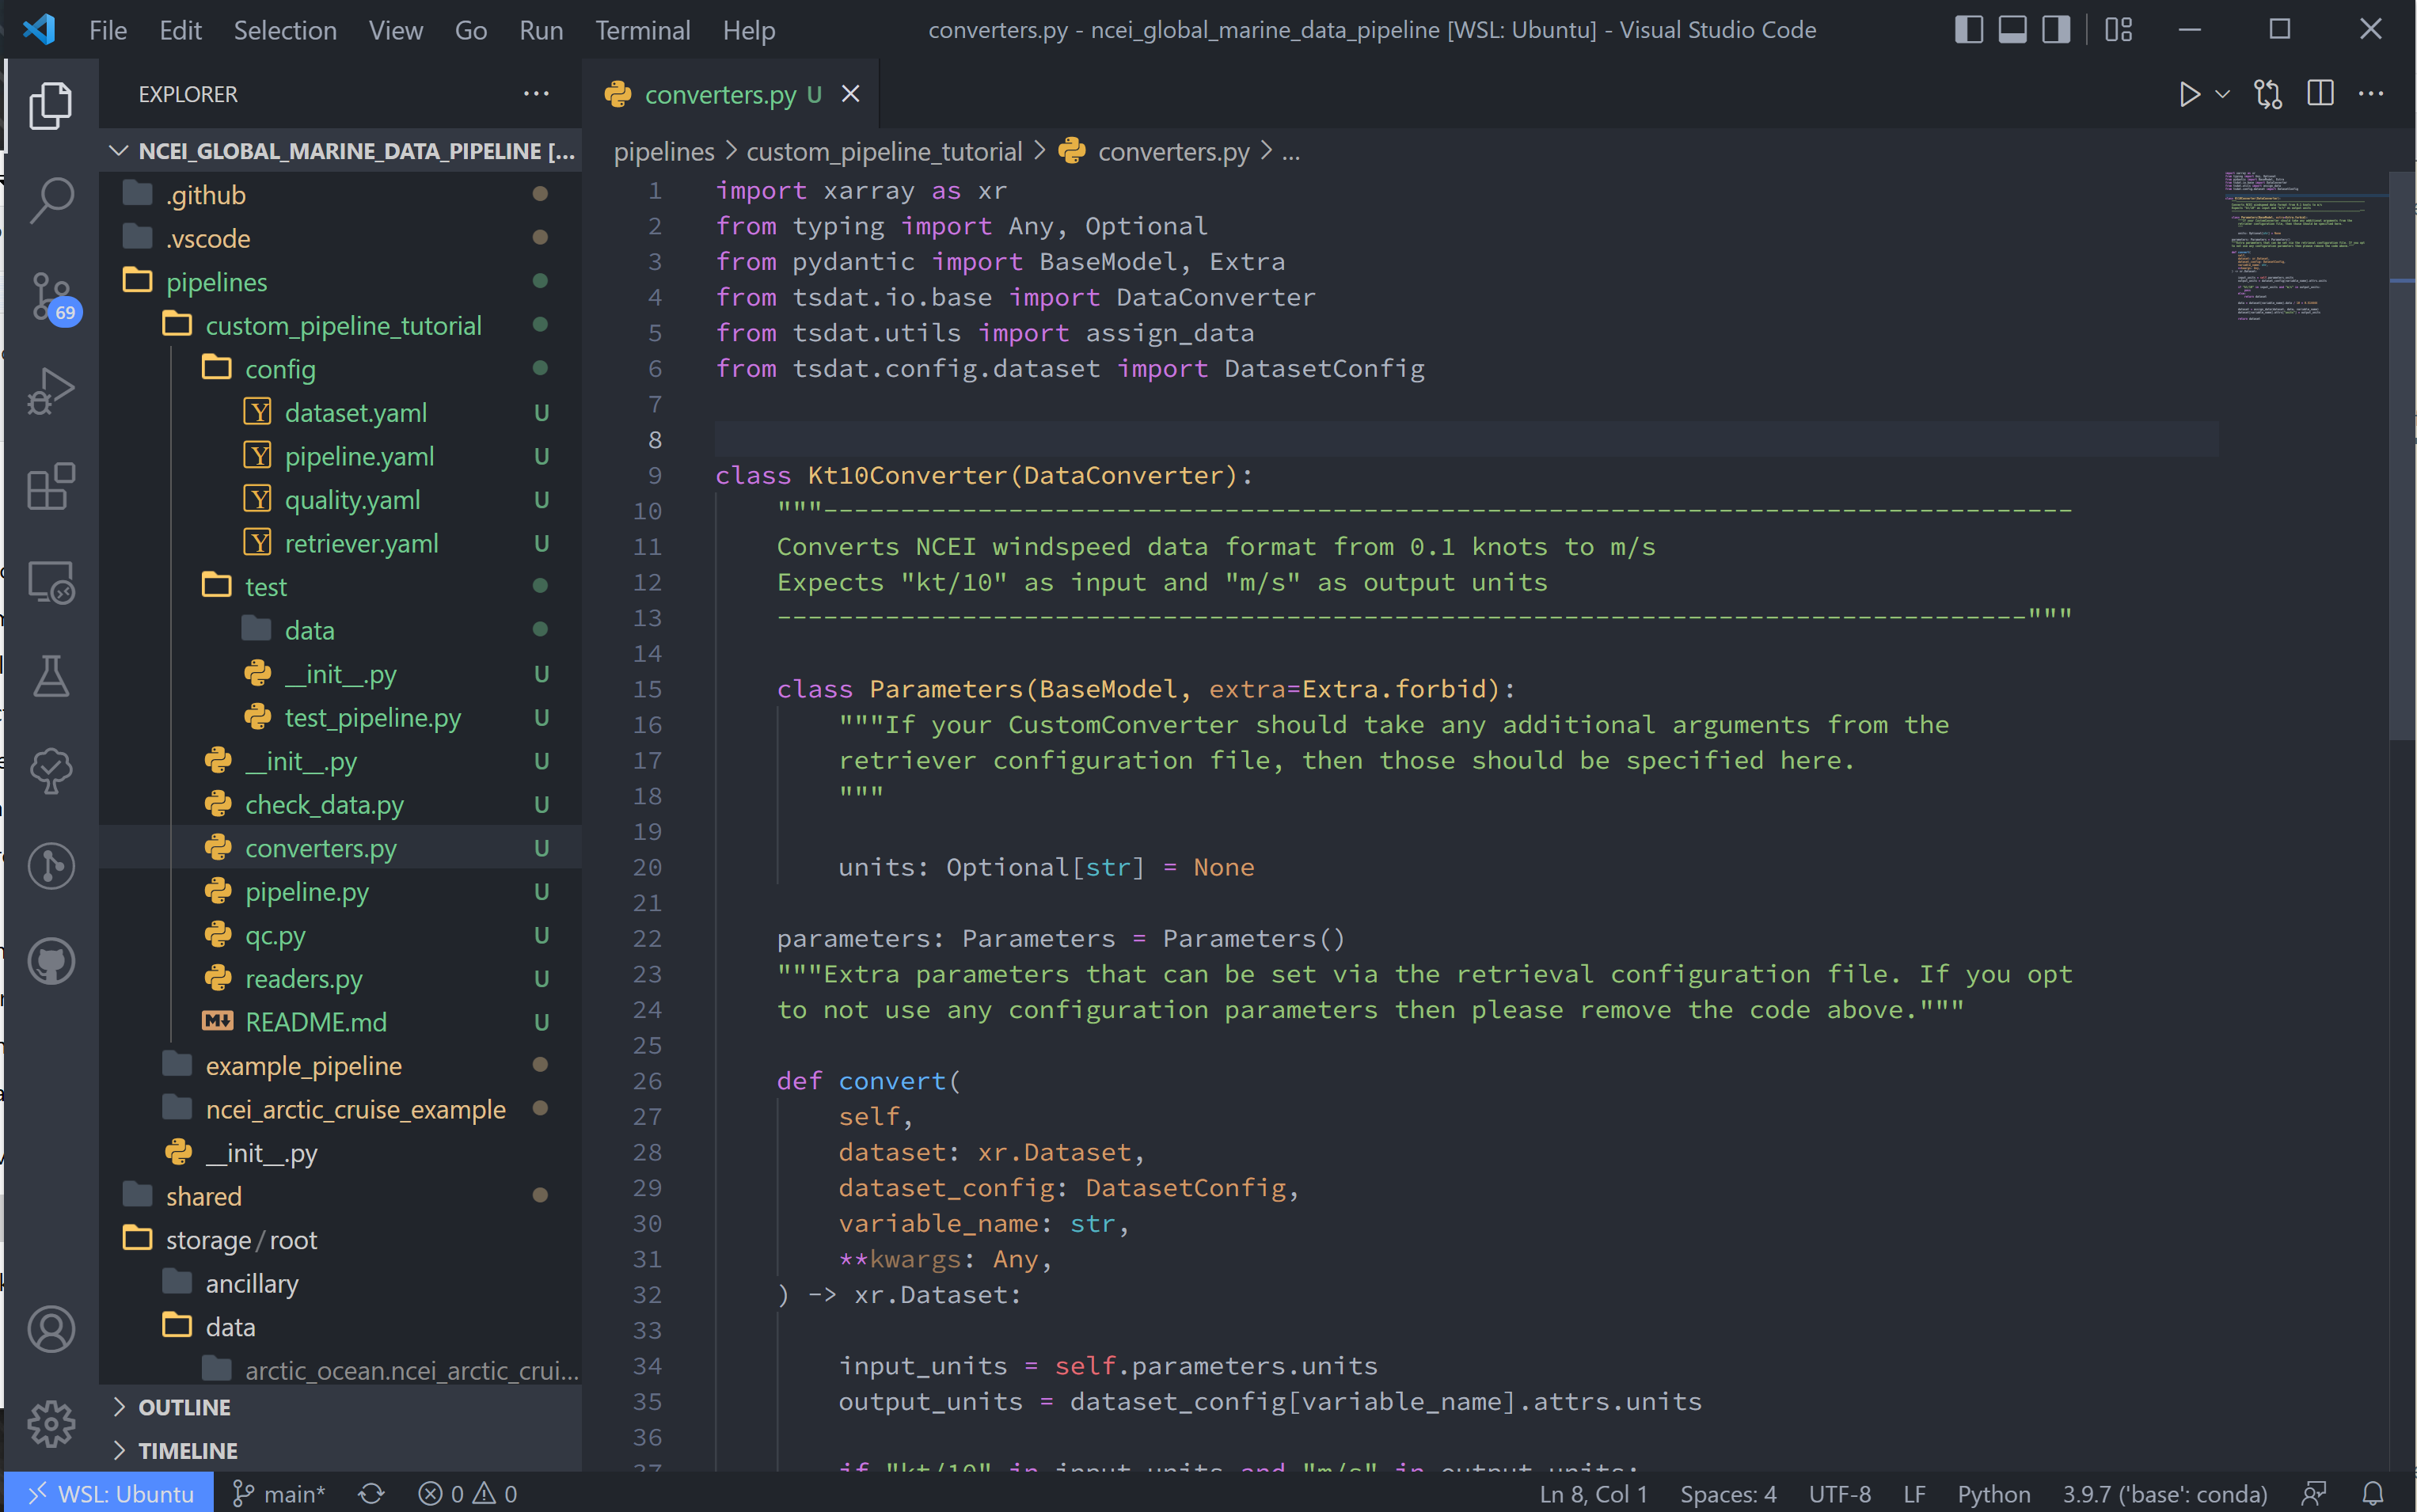
5. As stated in the NCEI NOAA documentation, the units for windspeed are recorded as either 1/10th of a knot or m/s, depending on the configuration. Because the rest of the file is saved in imperial units, I’m assuming the data is actually saved as 1/10th knots. This isn’t a standard unit, so we shall add a data converter to tackle this input in the codeblock below.
import xarray as xr
from typing import Any, Optional
from pydantic import BaseModel, Extra
from tsdat.io.base import DataConverter
from tsdat.utils import assign_data
from tsdat.config.dataset import DatasetConfig


class Kt10Converter(DataConverter):
    """---------------------------------------------------------------------------------
    Converts NCEI windspeed data format from 0.1 knots to m/s
    Expects "kt/10" as input and "m/s" as output units
    ---------------------------------------------------------------------------------"""

    class Parameters(BaseModel, extra=Extra.forbid):
        """If your CustomConverter should take any additional arguments from the
        retriever configuration file, then those should be specified here.
        """

        units: Optional[str] = None

    parameters: Parameters = Parameters()
    """Extra parameters that can be set via the retrieval configuration file. If you opt
    to not use any configuration parameters then please remove the code above."""

    def convert(
        self,
        dataset: xr.Dataset,
        dataset_config: DatasetConfig,
        variable_name: str,
        **kwargs: Any,
    ) -> xr.Dataset:

        input_units = self.parameters.units
        output_units = dataset_config[variable_name].attrs.units

        if "kt/10" in input_units and "m/s" in output_units:
            pass
        else:
            return dataset

        data = dataset[variable_name].data / 10 * 0.514444

        dataset = assign_data(dataset, data, variable_name)
        dataset[variable_name].attrs["units"] = output_units

        return dataset
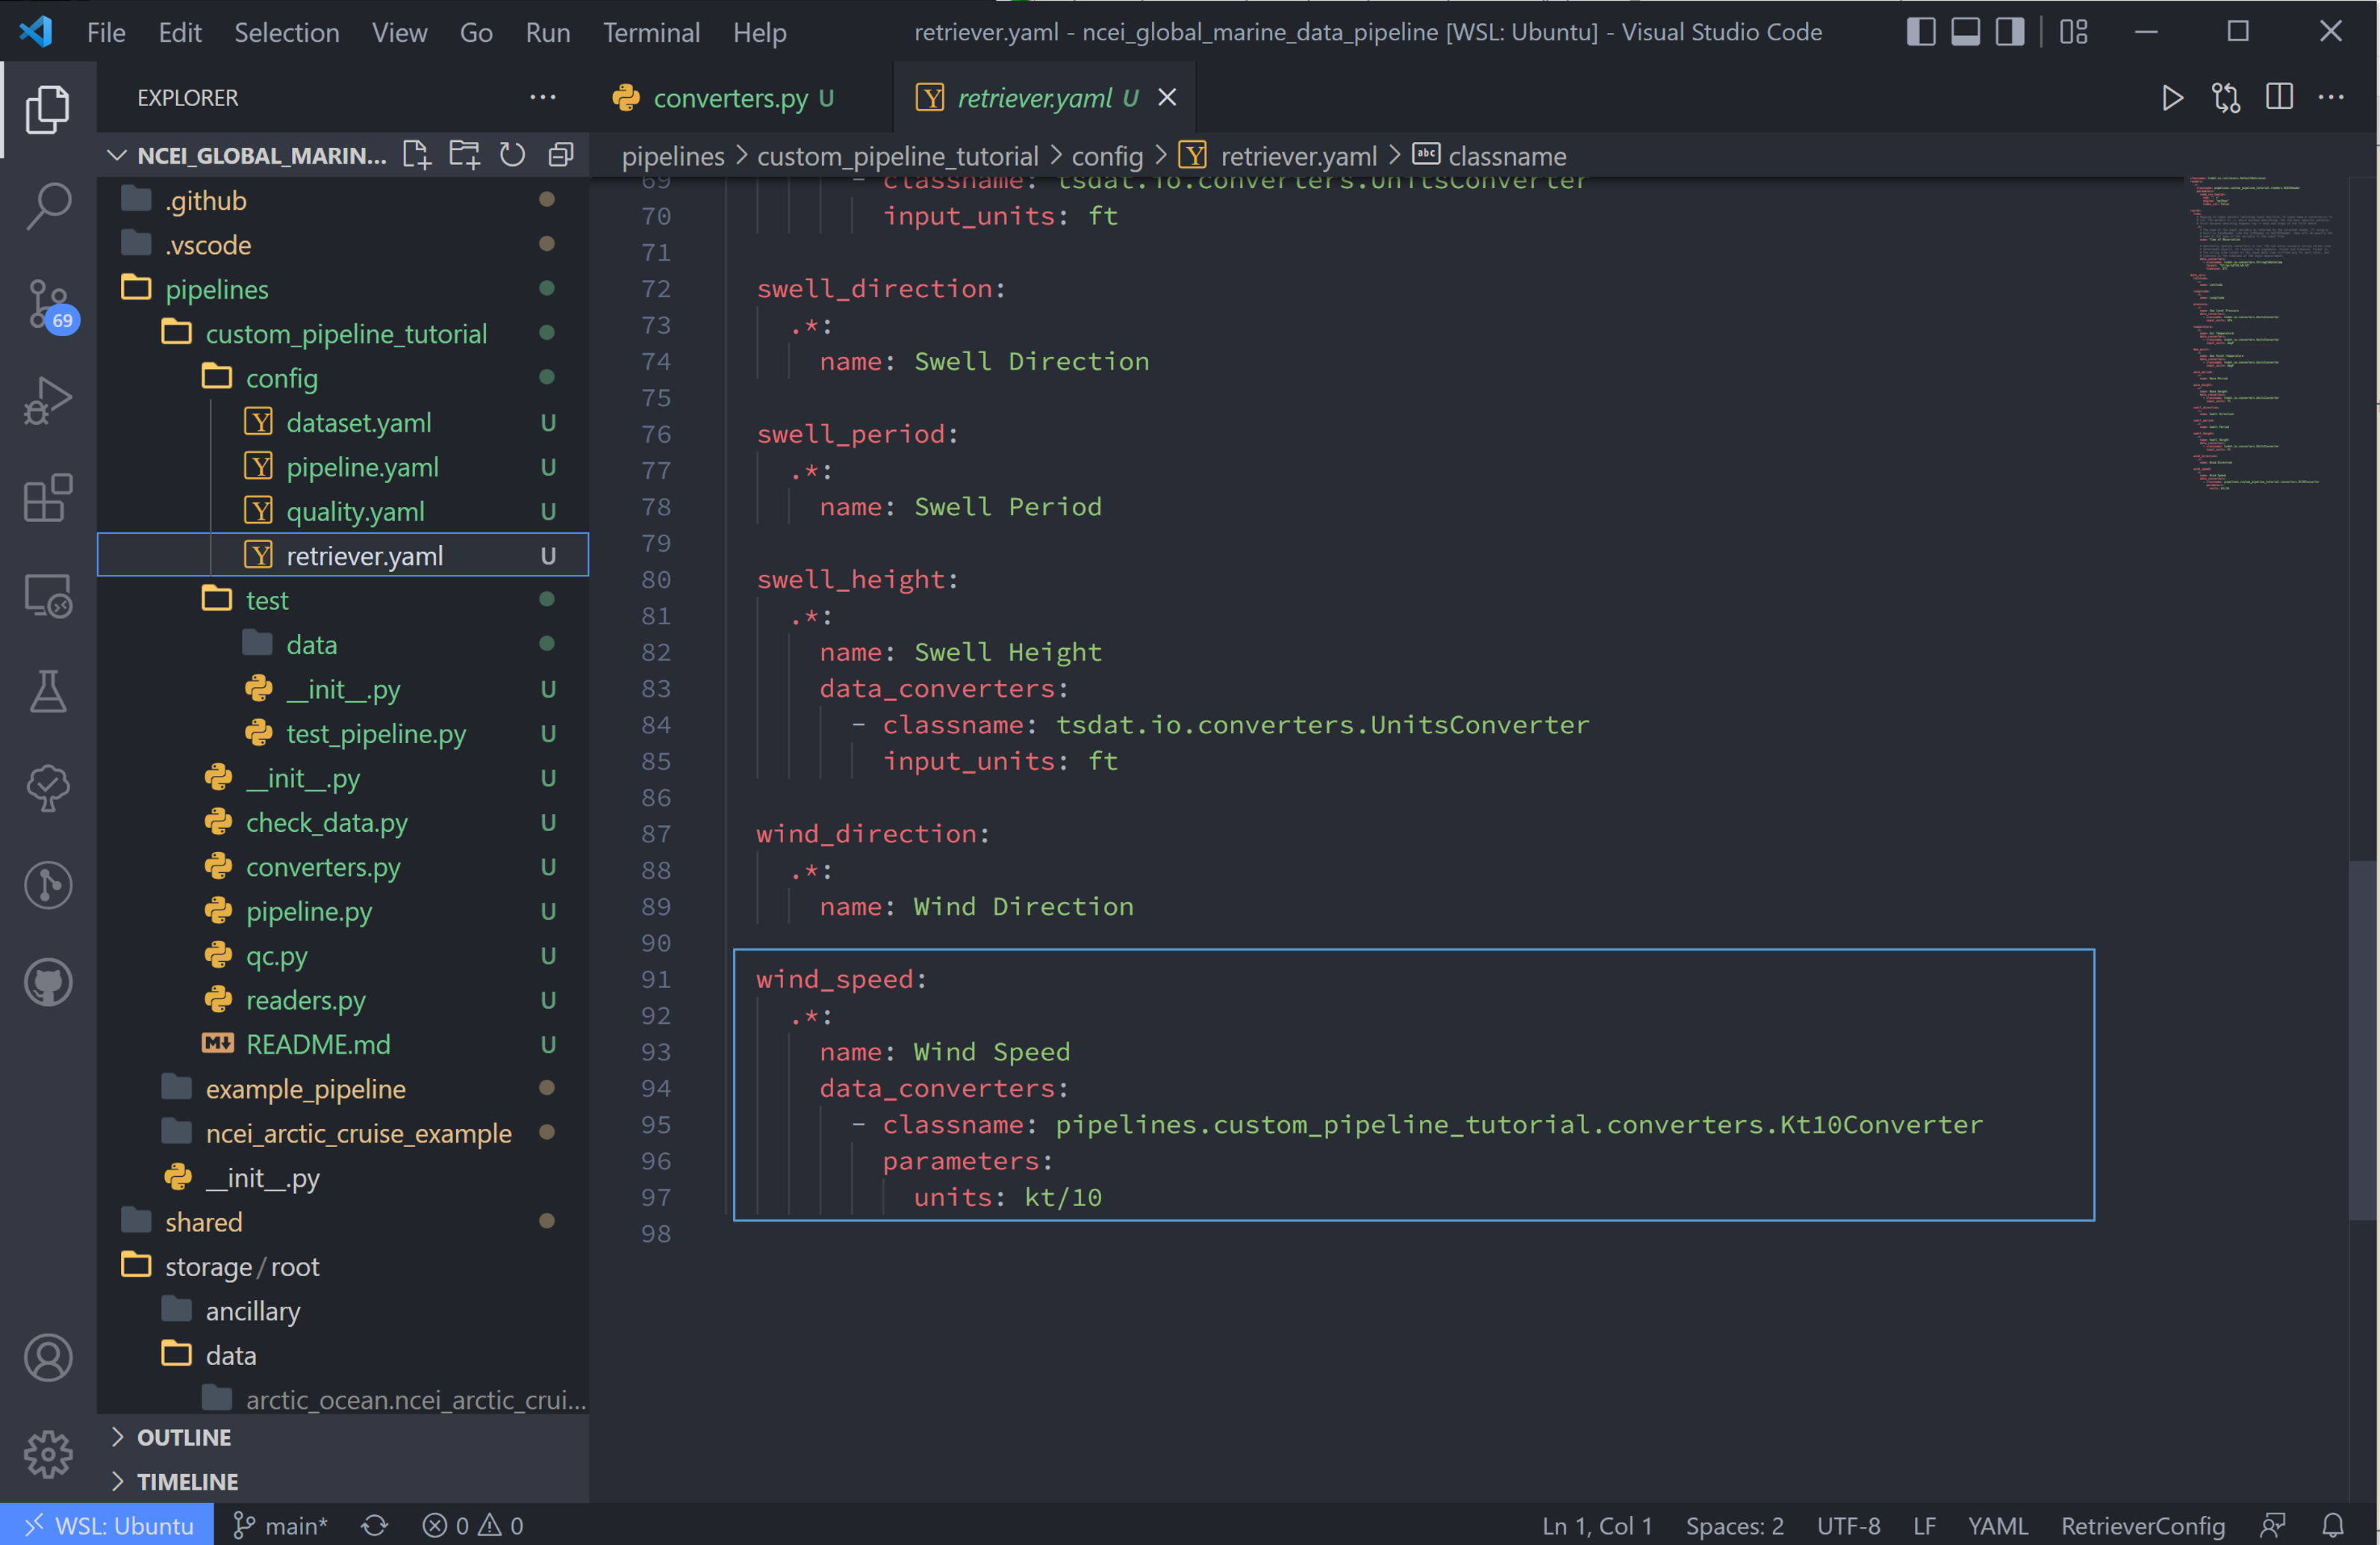
6. Now we configure the “wind_speed” variable to use this converter in the retriever.yaml file:
wind_speed:
  .*:
    name: Wind Speed
    data_converters:
      - classname: pipelines.<pipeline_name>.converters.Kt10Converter
        parameters:
          units: kt/10
Adding Custom Quality Control Funtions
First, a quick overview of how tsdat handles quality control (QC):
Tsdat has a number of native quality control functions that users could find useful. (See quality control API for all of them). These built-in functions can then be input into the pipeline config or shared folder quality.yaml, and many are already incorporated in the <pipeline_template>.
It is important to note that QC functions are applied one variable at a time.
For example:
quality_management:

  -name: Remove datapoints below minimum valid threshold
    checker:
      classname: tsdat.qc.checkers.CheckValidMin
    handlers:
      - classname: tsdat.qc.handlers.RemoveFailedValues
      - classname: tsdat.qc.handlers.RecordQualityResults
        parameters:
          bit: 2
          assessment: Bad
          meaning: "Value is less than expected range"
    apply_to:
      - DATA_VARS
    exclude: [foo, bar]
In the above block of code, a CheckValidMin check is run all variables except
variables named “foo” and “bar”. This QC check requires the “valid_range” attribute
on all variables running through it in the dataset.yaml file.
The two built-in handlers specified here remove failues (RemoveFailedValues) that
failed the QC check by replacing them with the attribute _FillValue.
The second handler used is RecordQualityResults, which requires parameters in the
quality.yaml block itself: bit, assessment, and meaning. This adds
“qc_<variable_name>” to the output data, where variable elements that fail a test
are assigned the value 2^bit - 1, otherwise zero.
A variable is set to run through a quality management block by adding the required attributes. To run a variable “distance” through the QC block shown above, add the required “valid_range” and “_FillValue” attributes like the following:
distance:
  dims: [time]
  dtype: float
  attrs:
    units: "m"
    valid_range: [-3, 3] # attribute for the "CheckValidMin" and "CheckValidMax" functions
    _FillValue: -999      # the "bad data" value
Now back to the tutorial steps:
Custom QC code in tsdat allows a user to create both checkers and handlers. Like readers, you can add as many of each as one would like. Checkers should return a boolean numpy array (True/False), where True refers to flagged data, for each variable in the raw dataset. Handlers take this boolean array and apply some function to the data variable it was created from.
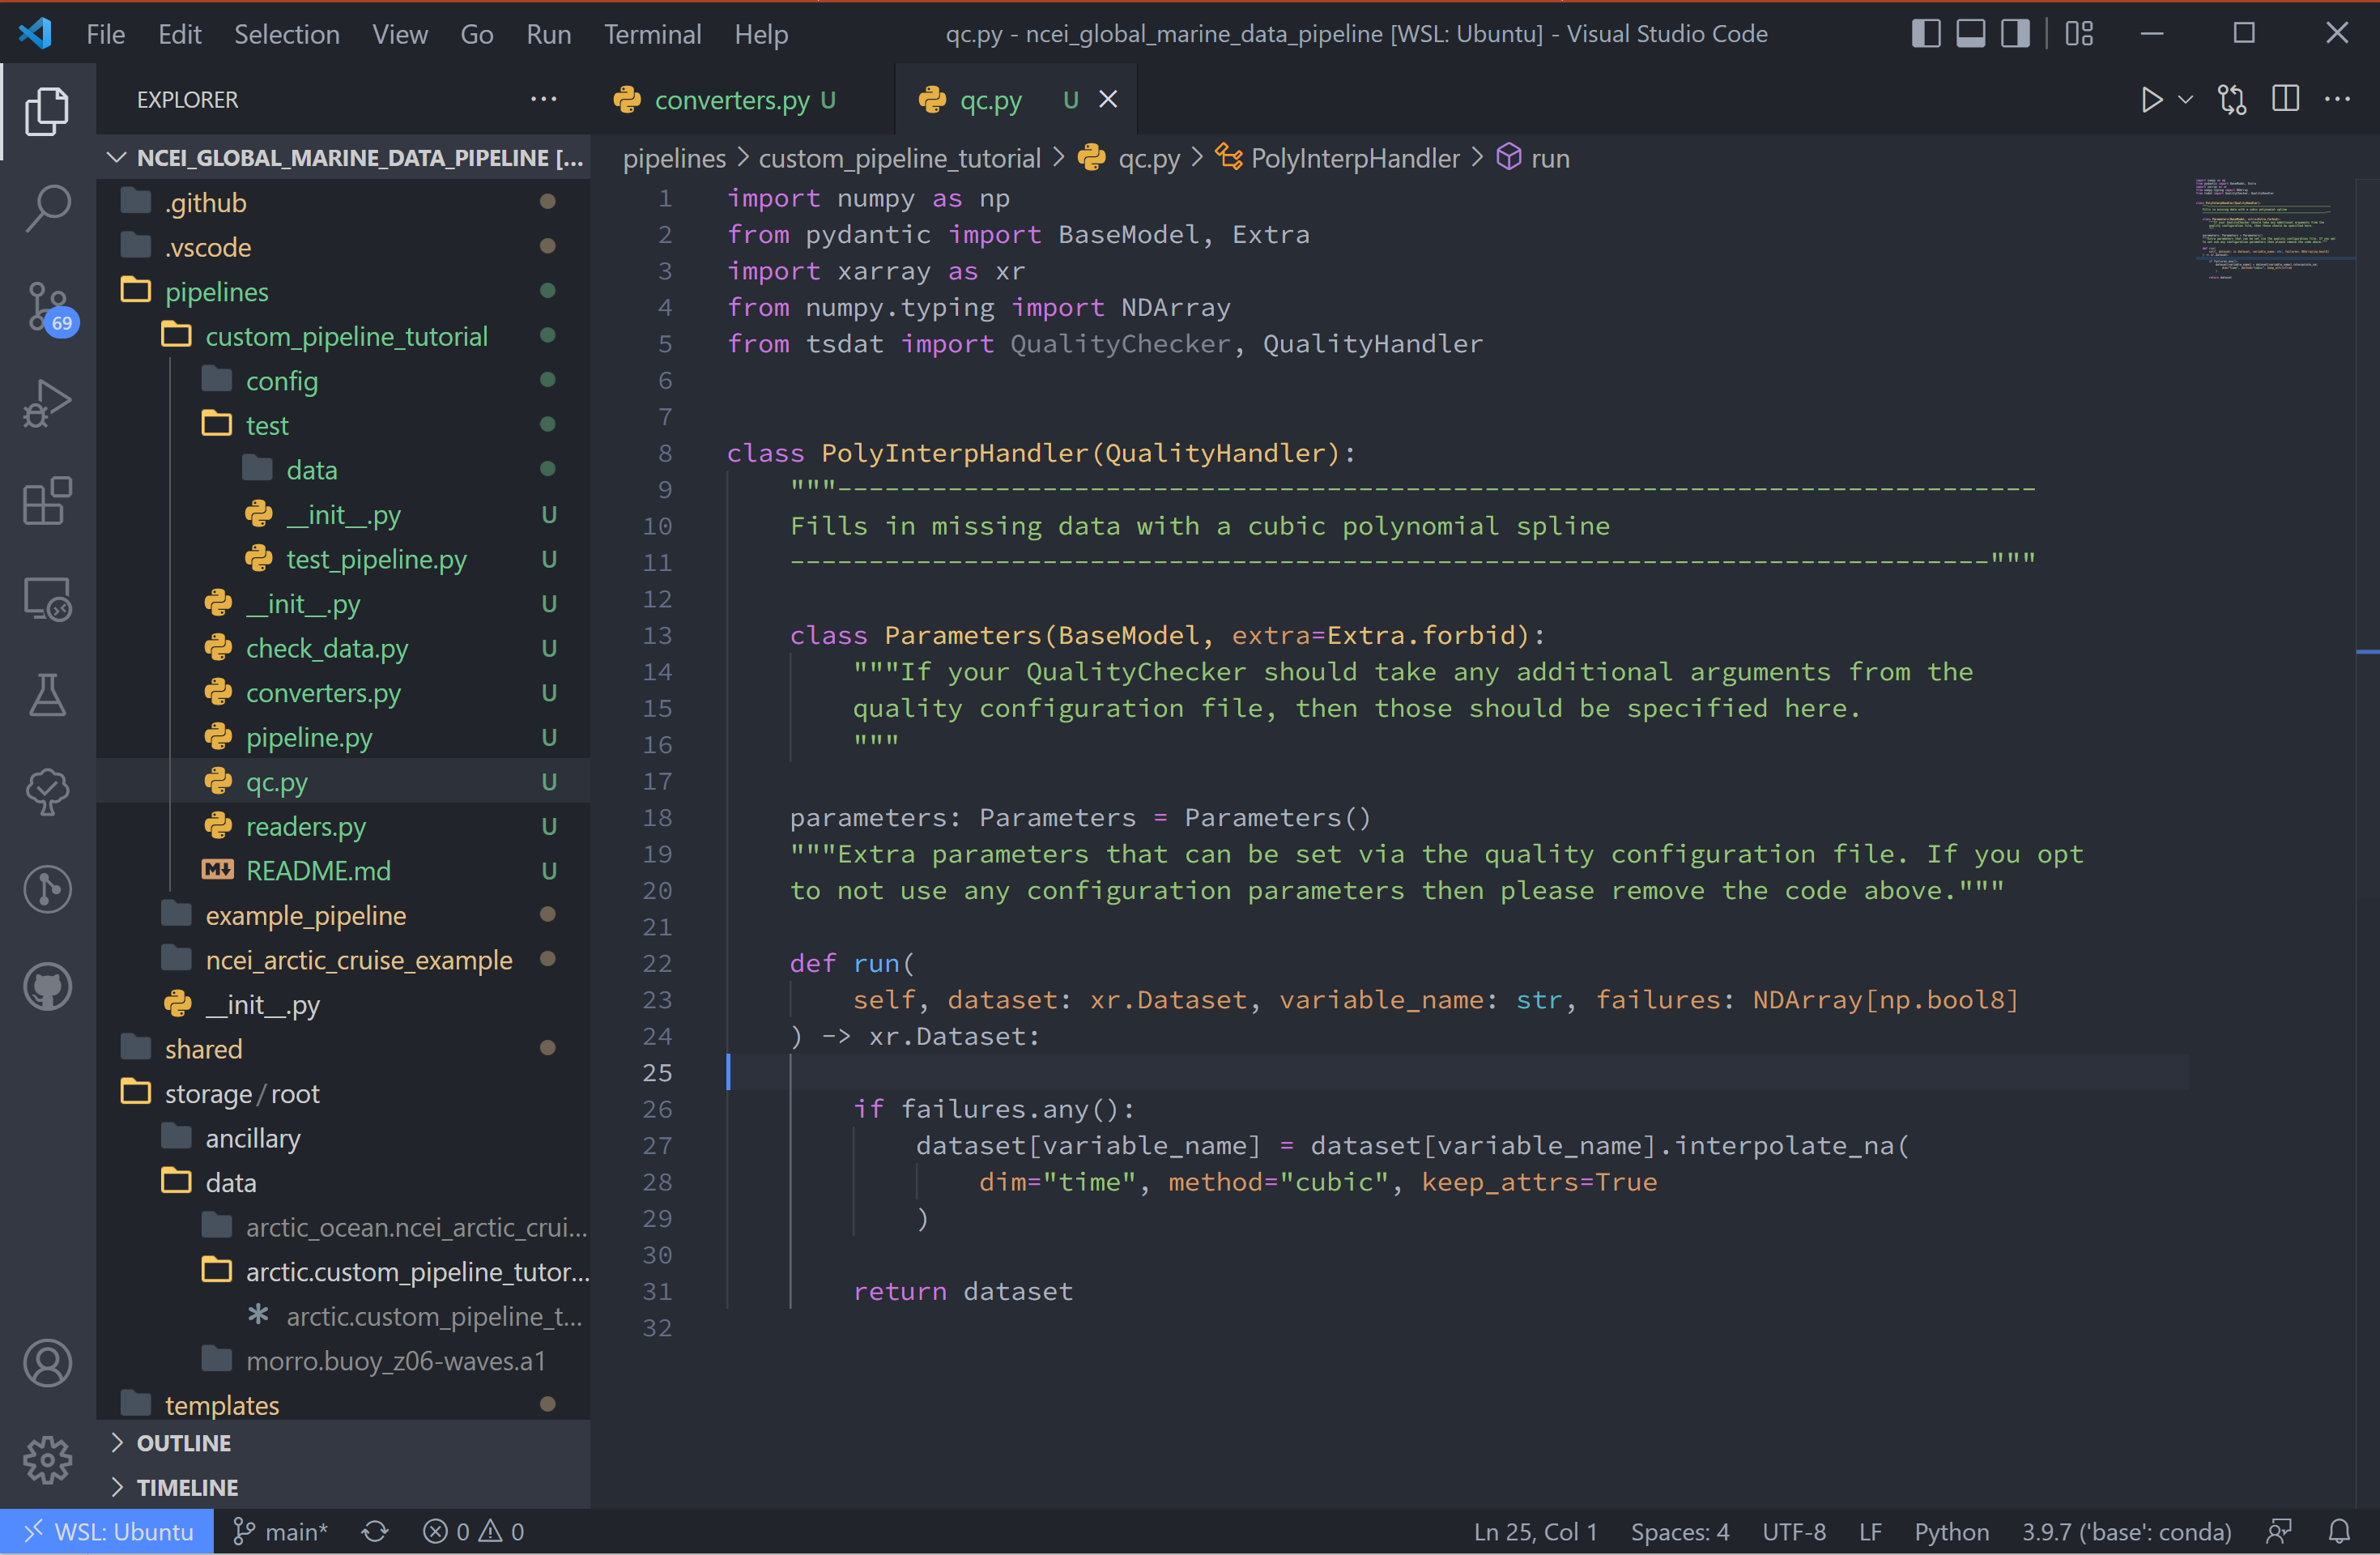
7. For this tutorial, we’ll add a QC handler that interpolates missing data with a cubic polynomial using one of xarray’s functions:
import numpy as np
from pydantic import BaseModel, Extra
import xarray as xr
from numpy.typing import NDArray
from tsdat import QualityChecker, QualityHandler


class PolyInterpHandler(QualityHandler):
    """----------------------------------------------------------------------------
    Fills in missing data with a cubic polynomial spline
    ----------------------------------------------------------------------------"""

    class Parameters(BaseModel, extra=Extra.forbid):
        """If your QualityChecker should take any additional arguments from the
        quality configuration file, then those should be specified here.
        """

    parameters: Parameters = Parameters()
    """Extra parameters can be set via the quality configuration file. If you opt
    to not use any configuration parameters then please remove the code above."""

    def run(
        self, dataset: xr.Dataset, variable_name: str, failures: NDArray[np.bool8]
    ) -> xr.Dataset:

        if failures.any():
            # Make sure failed datapoints have been removed
            dataset[variable_name] = dataset[variable_name].where(~failures)

            # Interpolate with cubic polynomial
            dataset[variable_name] = dataset[variable_name].interpolate_na(
                dim="time", method="cubic", keep_attrs=True
            )

        return dataset
You’ll see that the “run” function here is given three inputs:
dataset - currently processed dataset
variable_name - current variable undergoing QC
failures - the true/false array, where true refers to values that failed the QC check
In this case, the checker is CheckMissing, which flags datapoints already missing
from the dataset. If the checker returned a “failures” array had datapoints flagged
that weren’t missing, I would want to make sure to remove those datapoints before passing
to xarray.dataset[variable_name].interpolate_na.
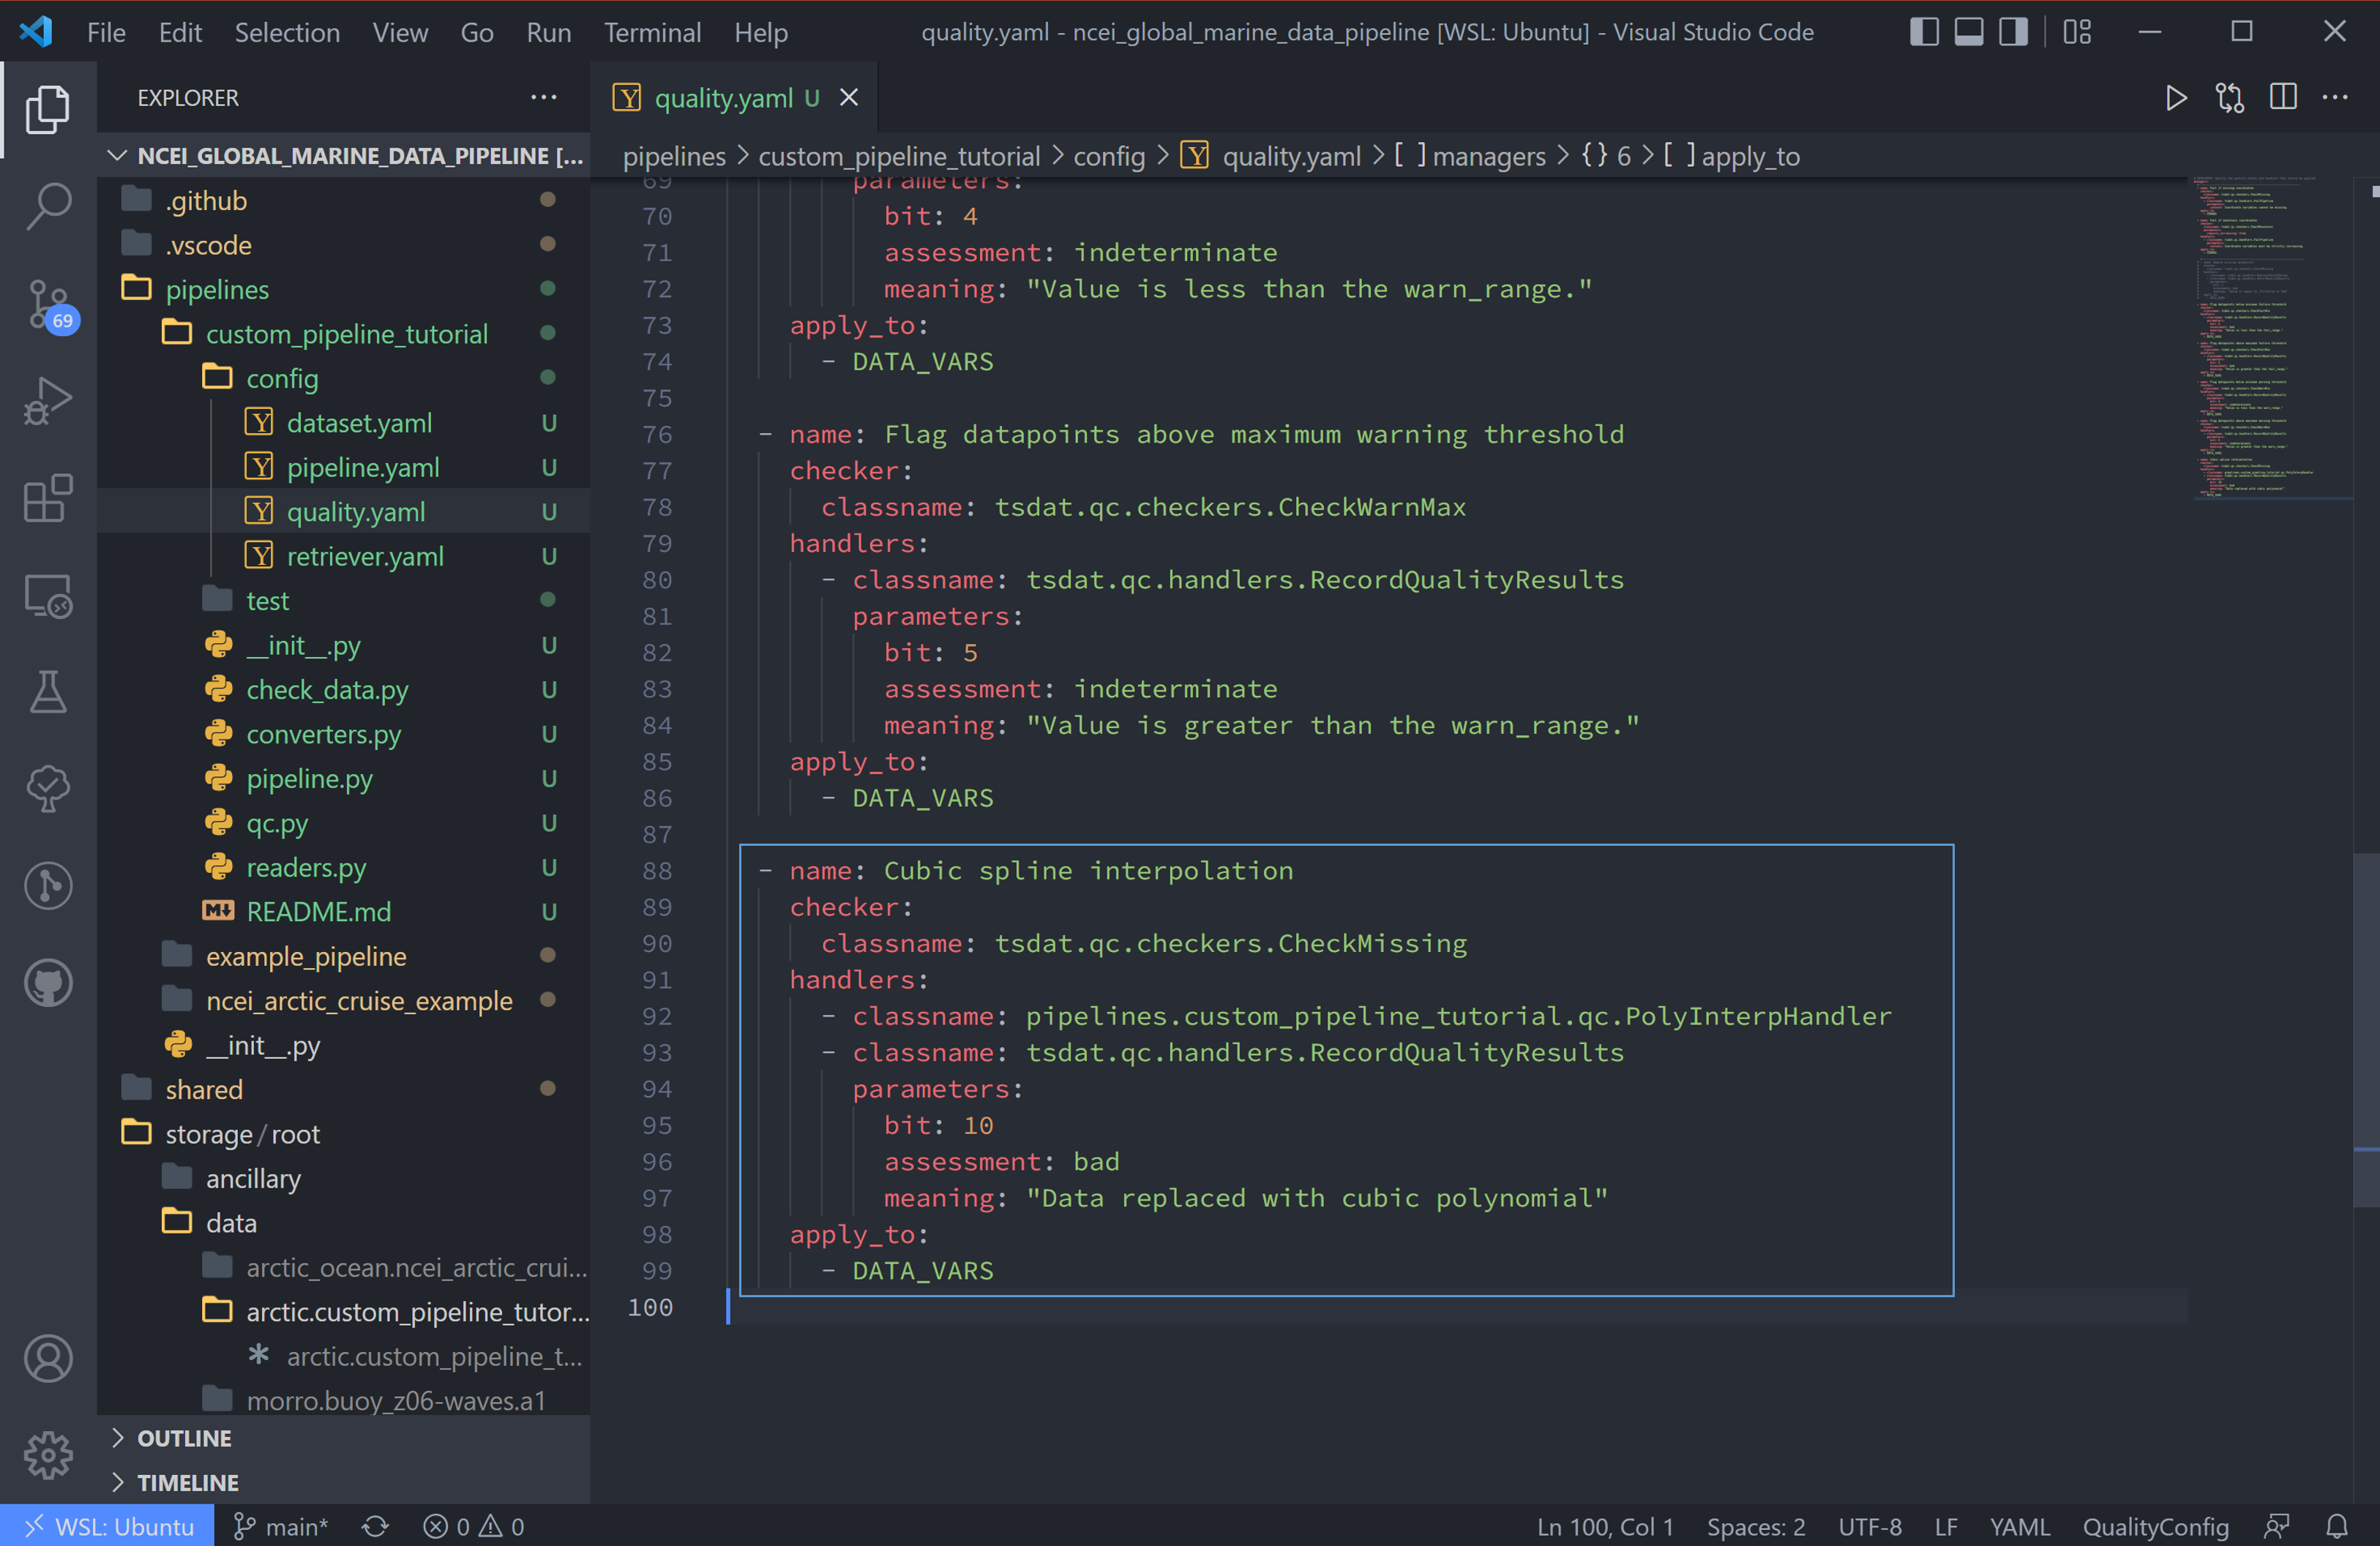
8. We then update the quality.yaml file and replace the custom input with our most
recent code. We’ll continue to use CheckMissing and RecordQualityResults here.
Note, you will need to remove the Remove missing datapoints QC block
(the first block with RemoveFailedValues) for interpolation to function. If
running multiple QC tests, you will want to make sure they aren’t overwriting each
other.
managers:

  - name: Cubic spline interpolation
    checker:
      classname: tsdat.qc.checkers.CheckMissing
    handlers:
      - classname: pipelines.<pipeline_name>.qc.PolyInterpHandler
      - classname: tsdat.qc.handlers.RecordQualityResults
        parameters:
          bit: 10
          assessment: bad
          meaning: "Data replaced with cubic polynomial"
    apply_to:
      - DATA_VARS
Run the Pipeline
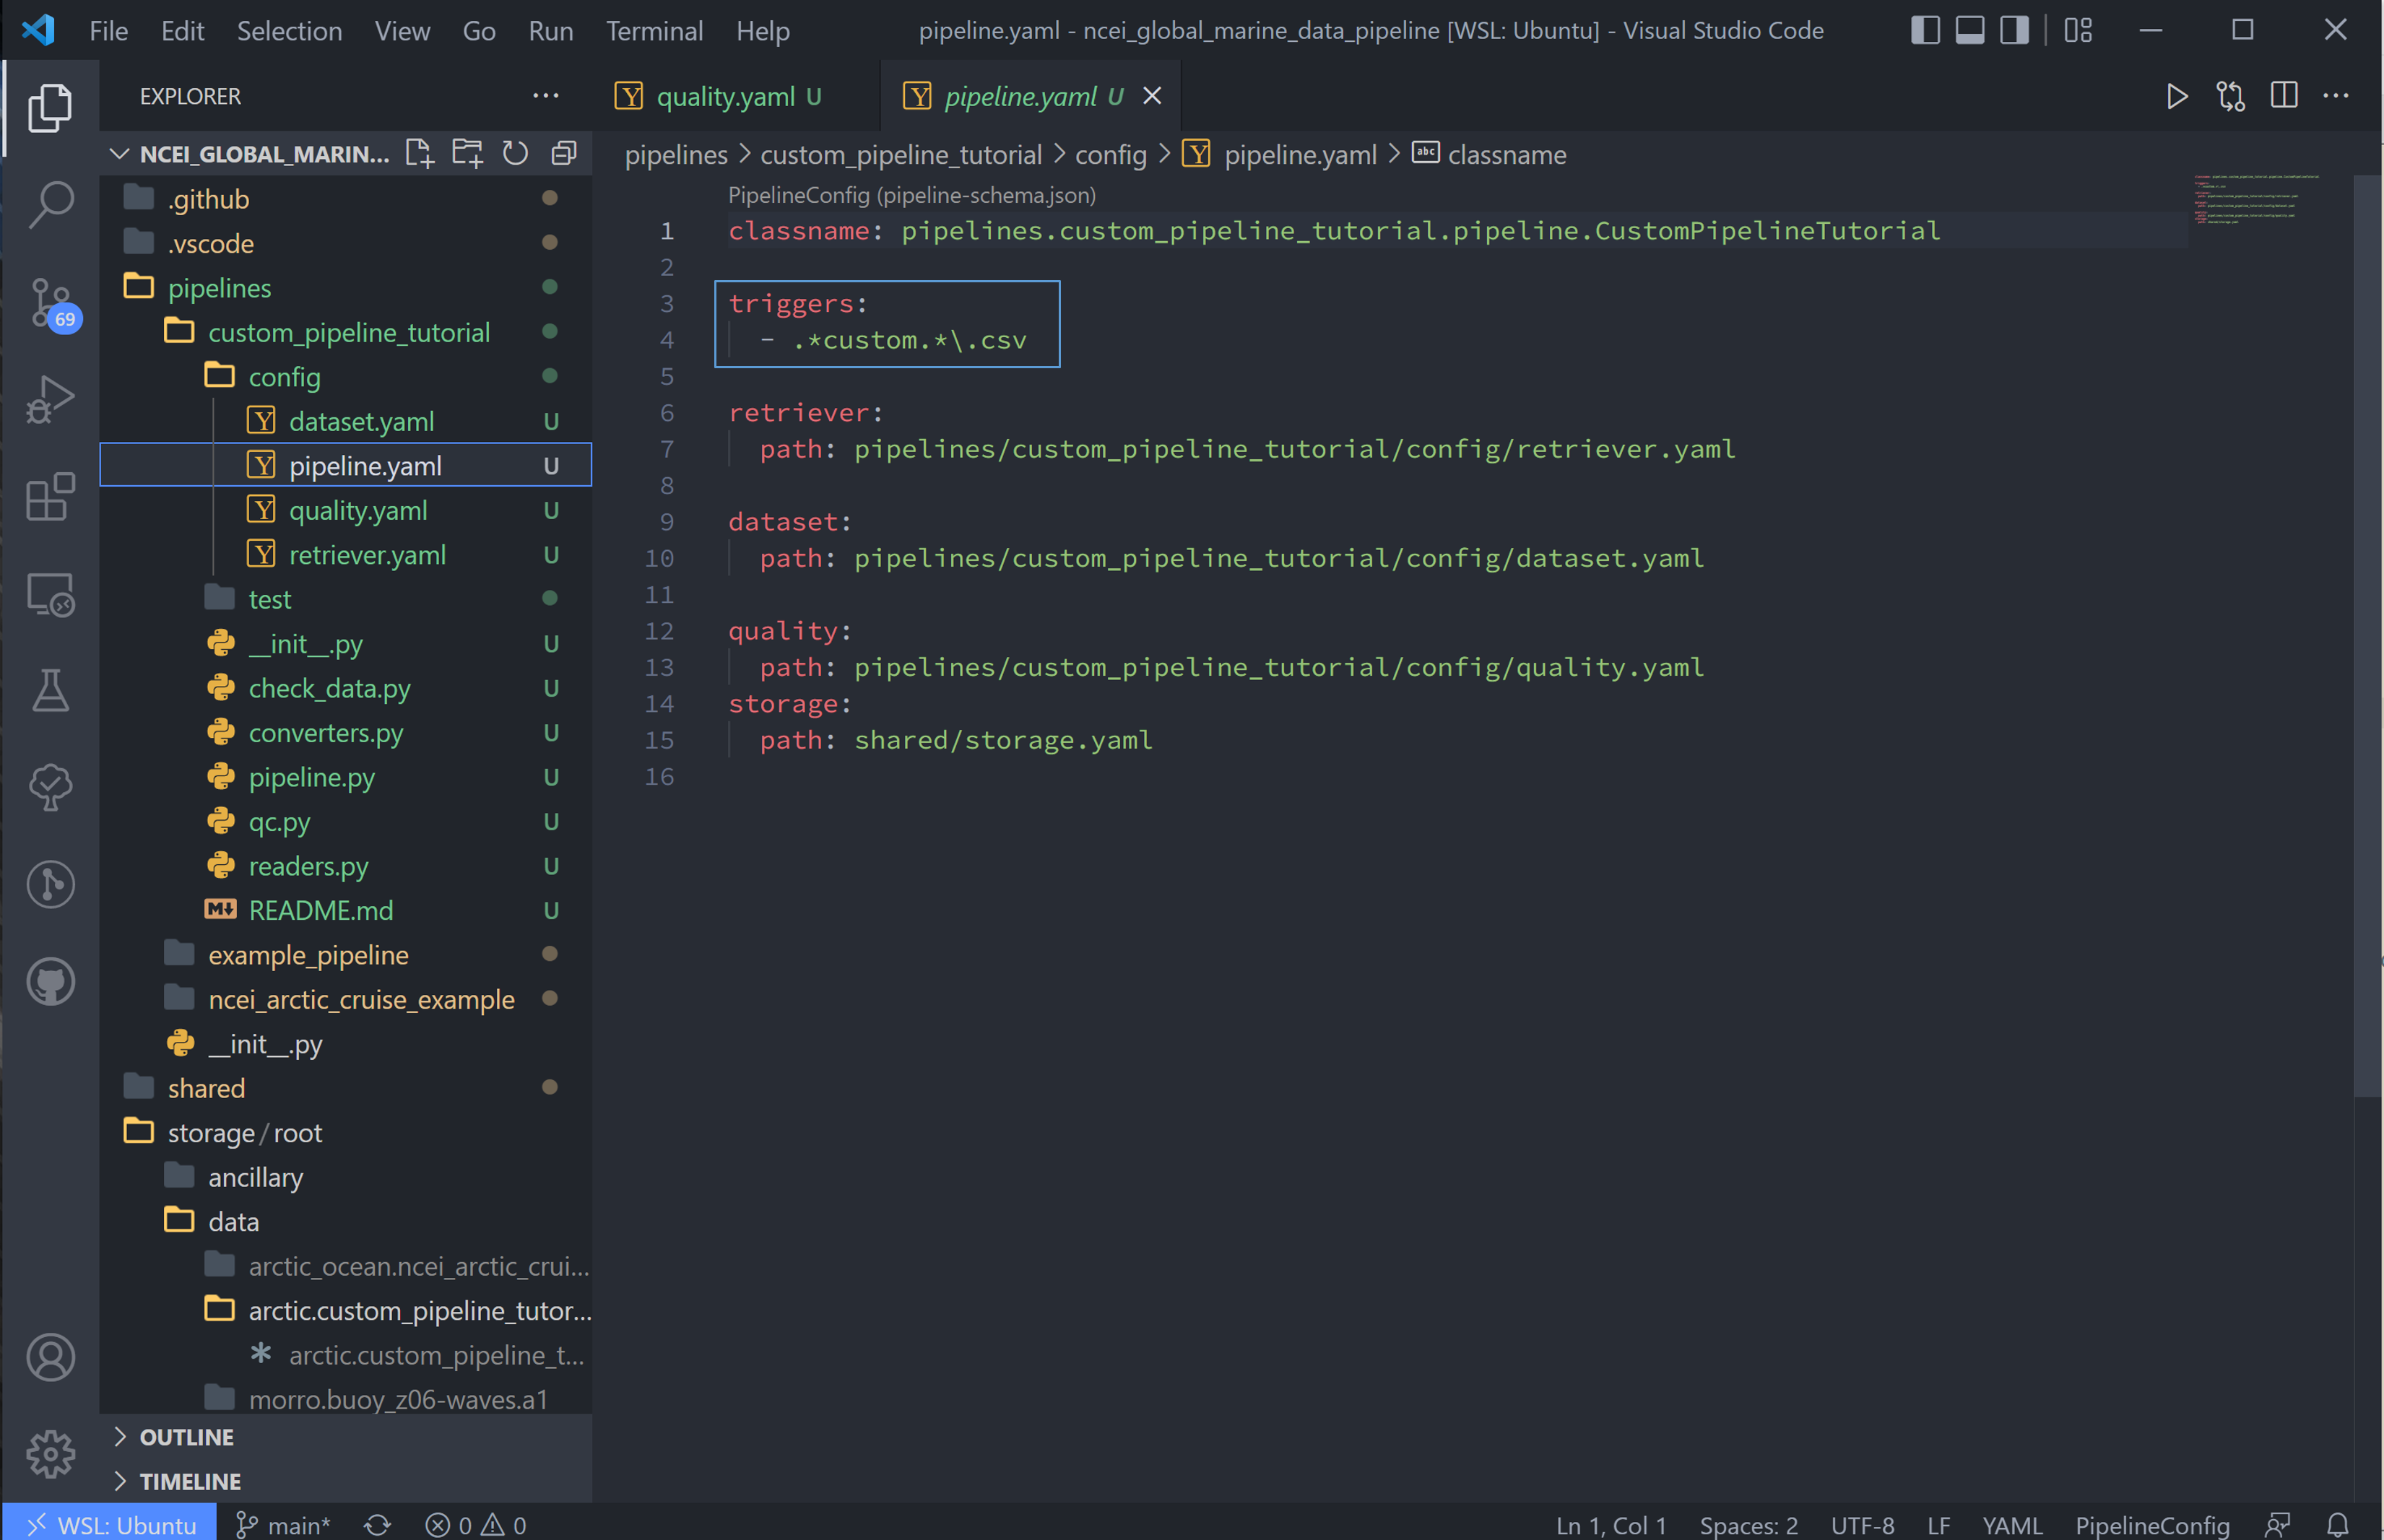
9. There are a couple more things. First we need to update the pipeline regex pattern in the pipeline.yaml file to run files in this particular pipeline, and we’ll do this by changing the triggers block:
triggers:
- .*custom.*\.csv
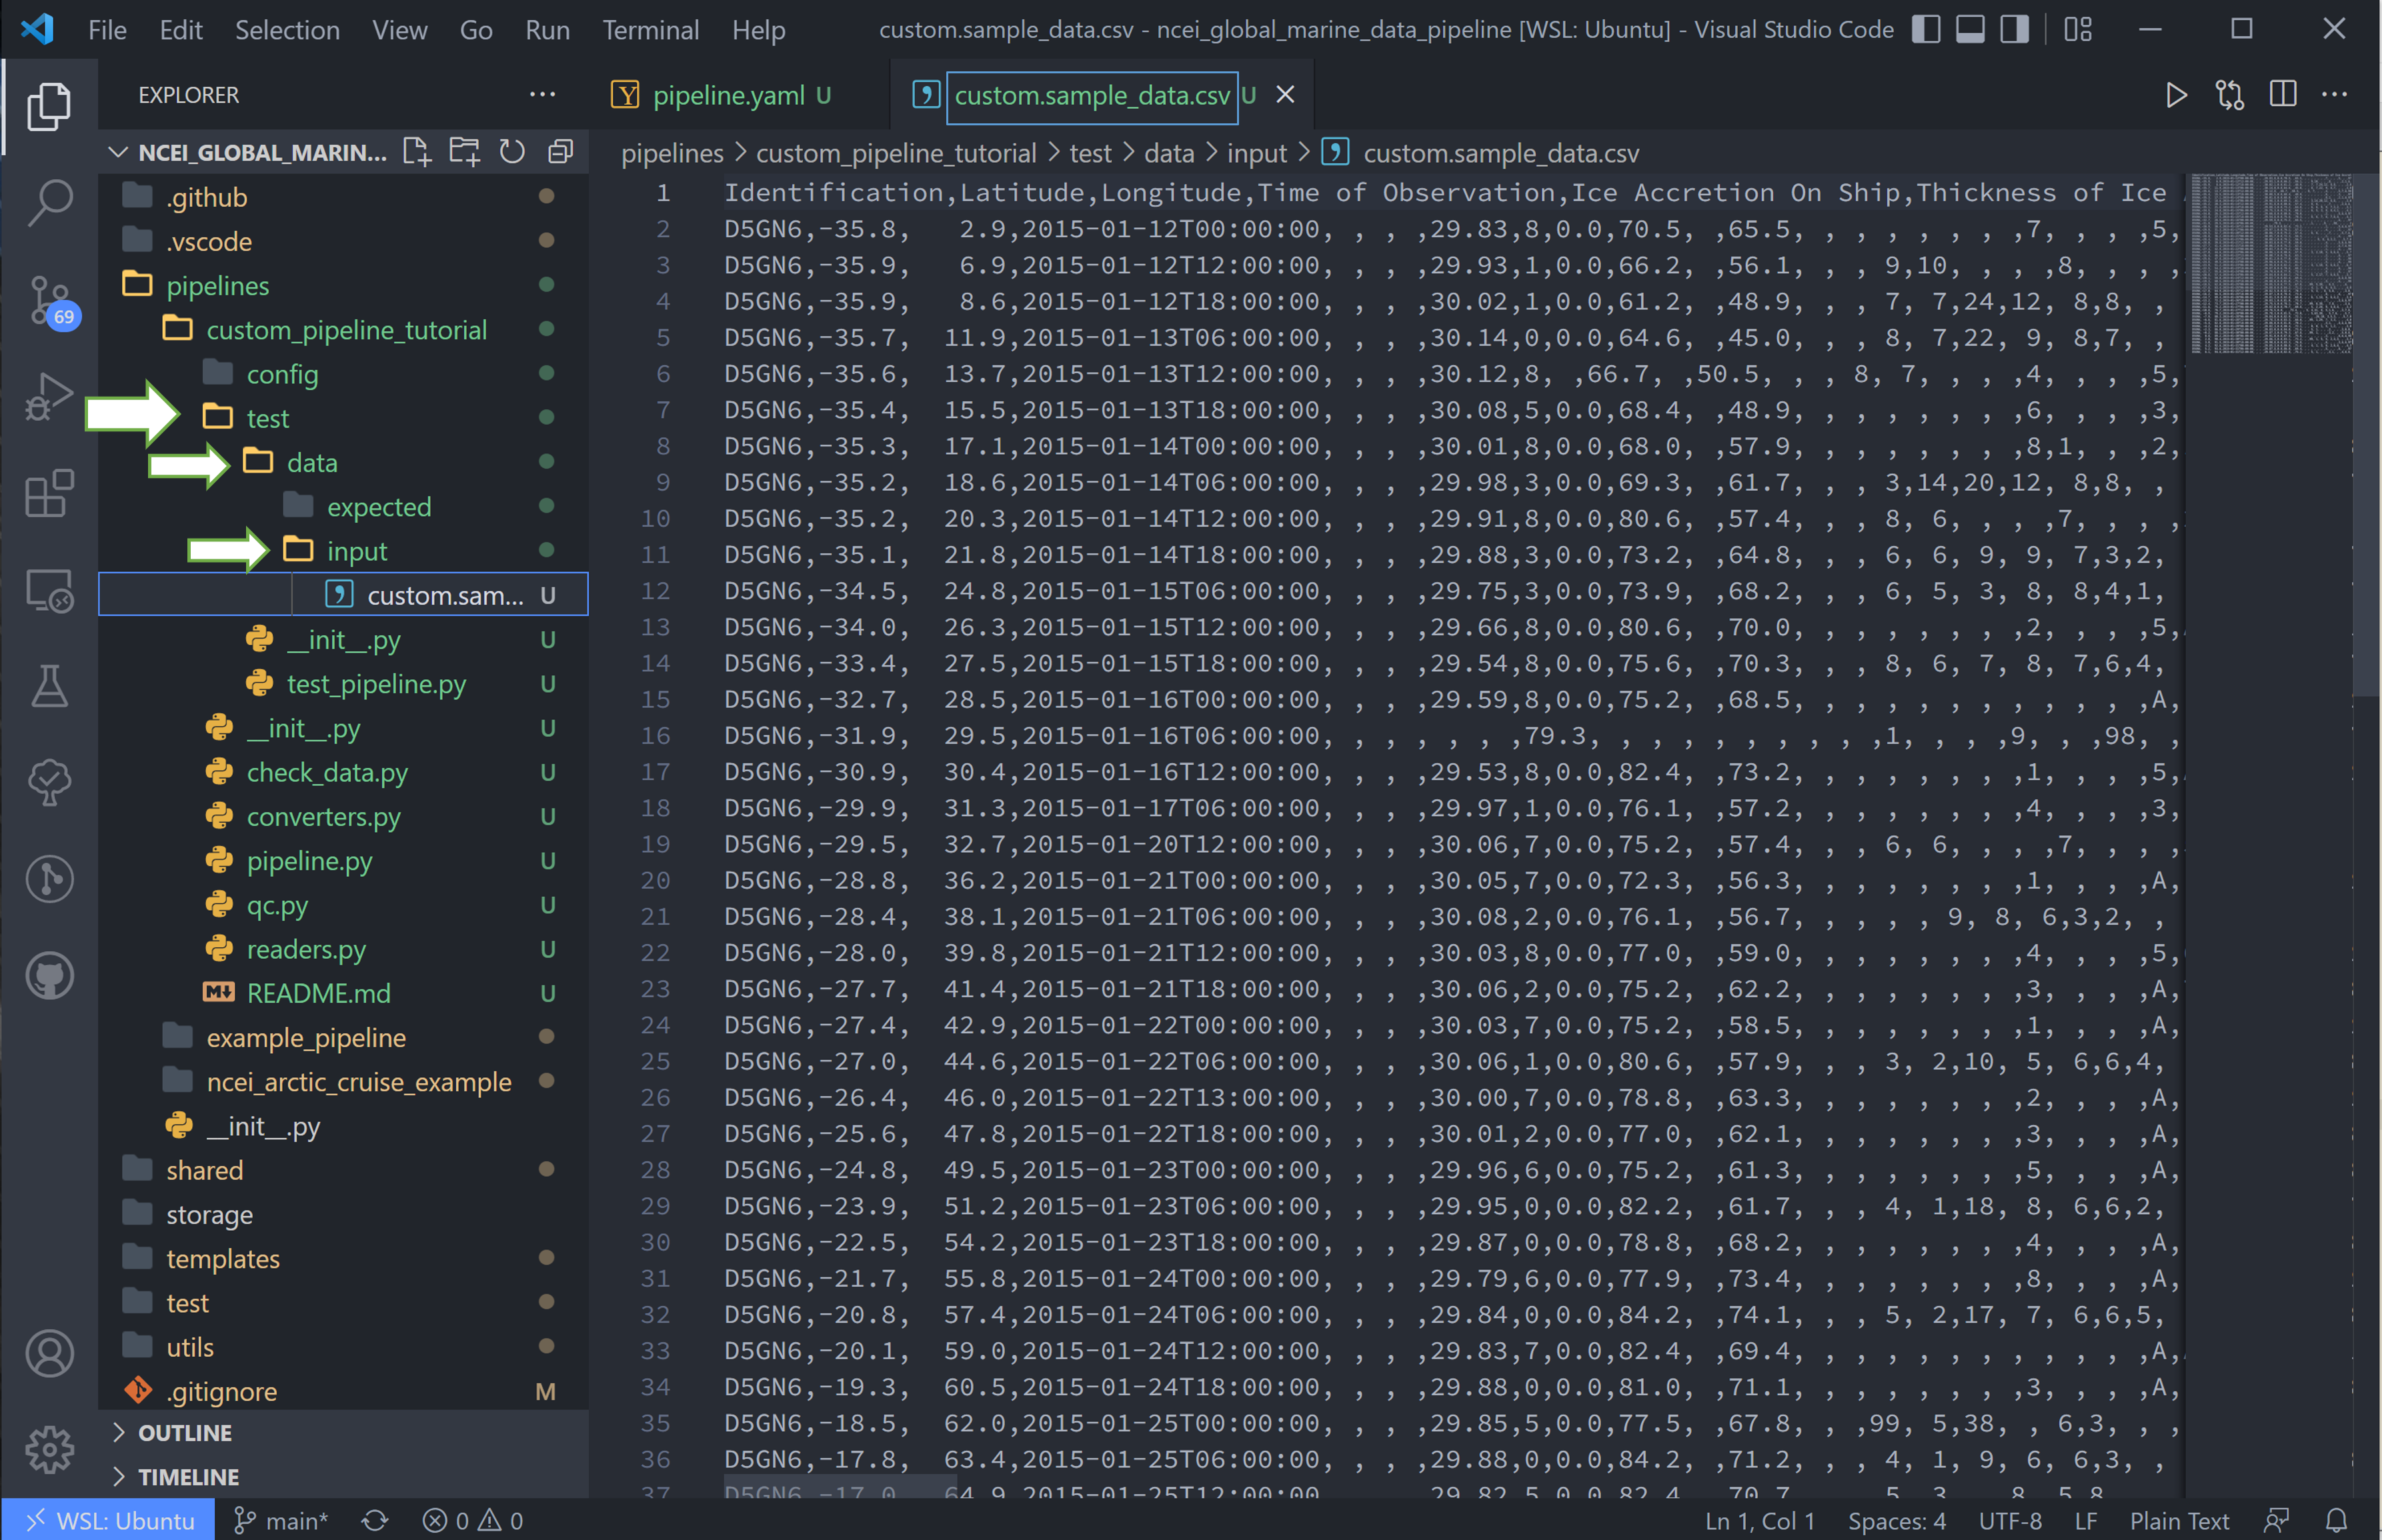
10. Next, we want to copy the data to this pipeline and rename it to match the regex pattern. The data here is stored in the test/data/input/ folder, but can be anywhere, and I have named this data custom.sample_data.csv.
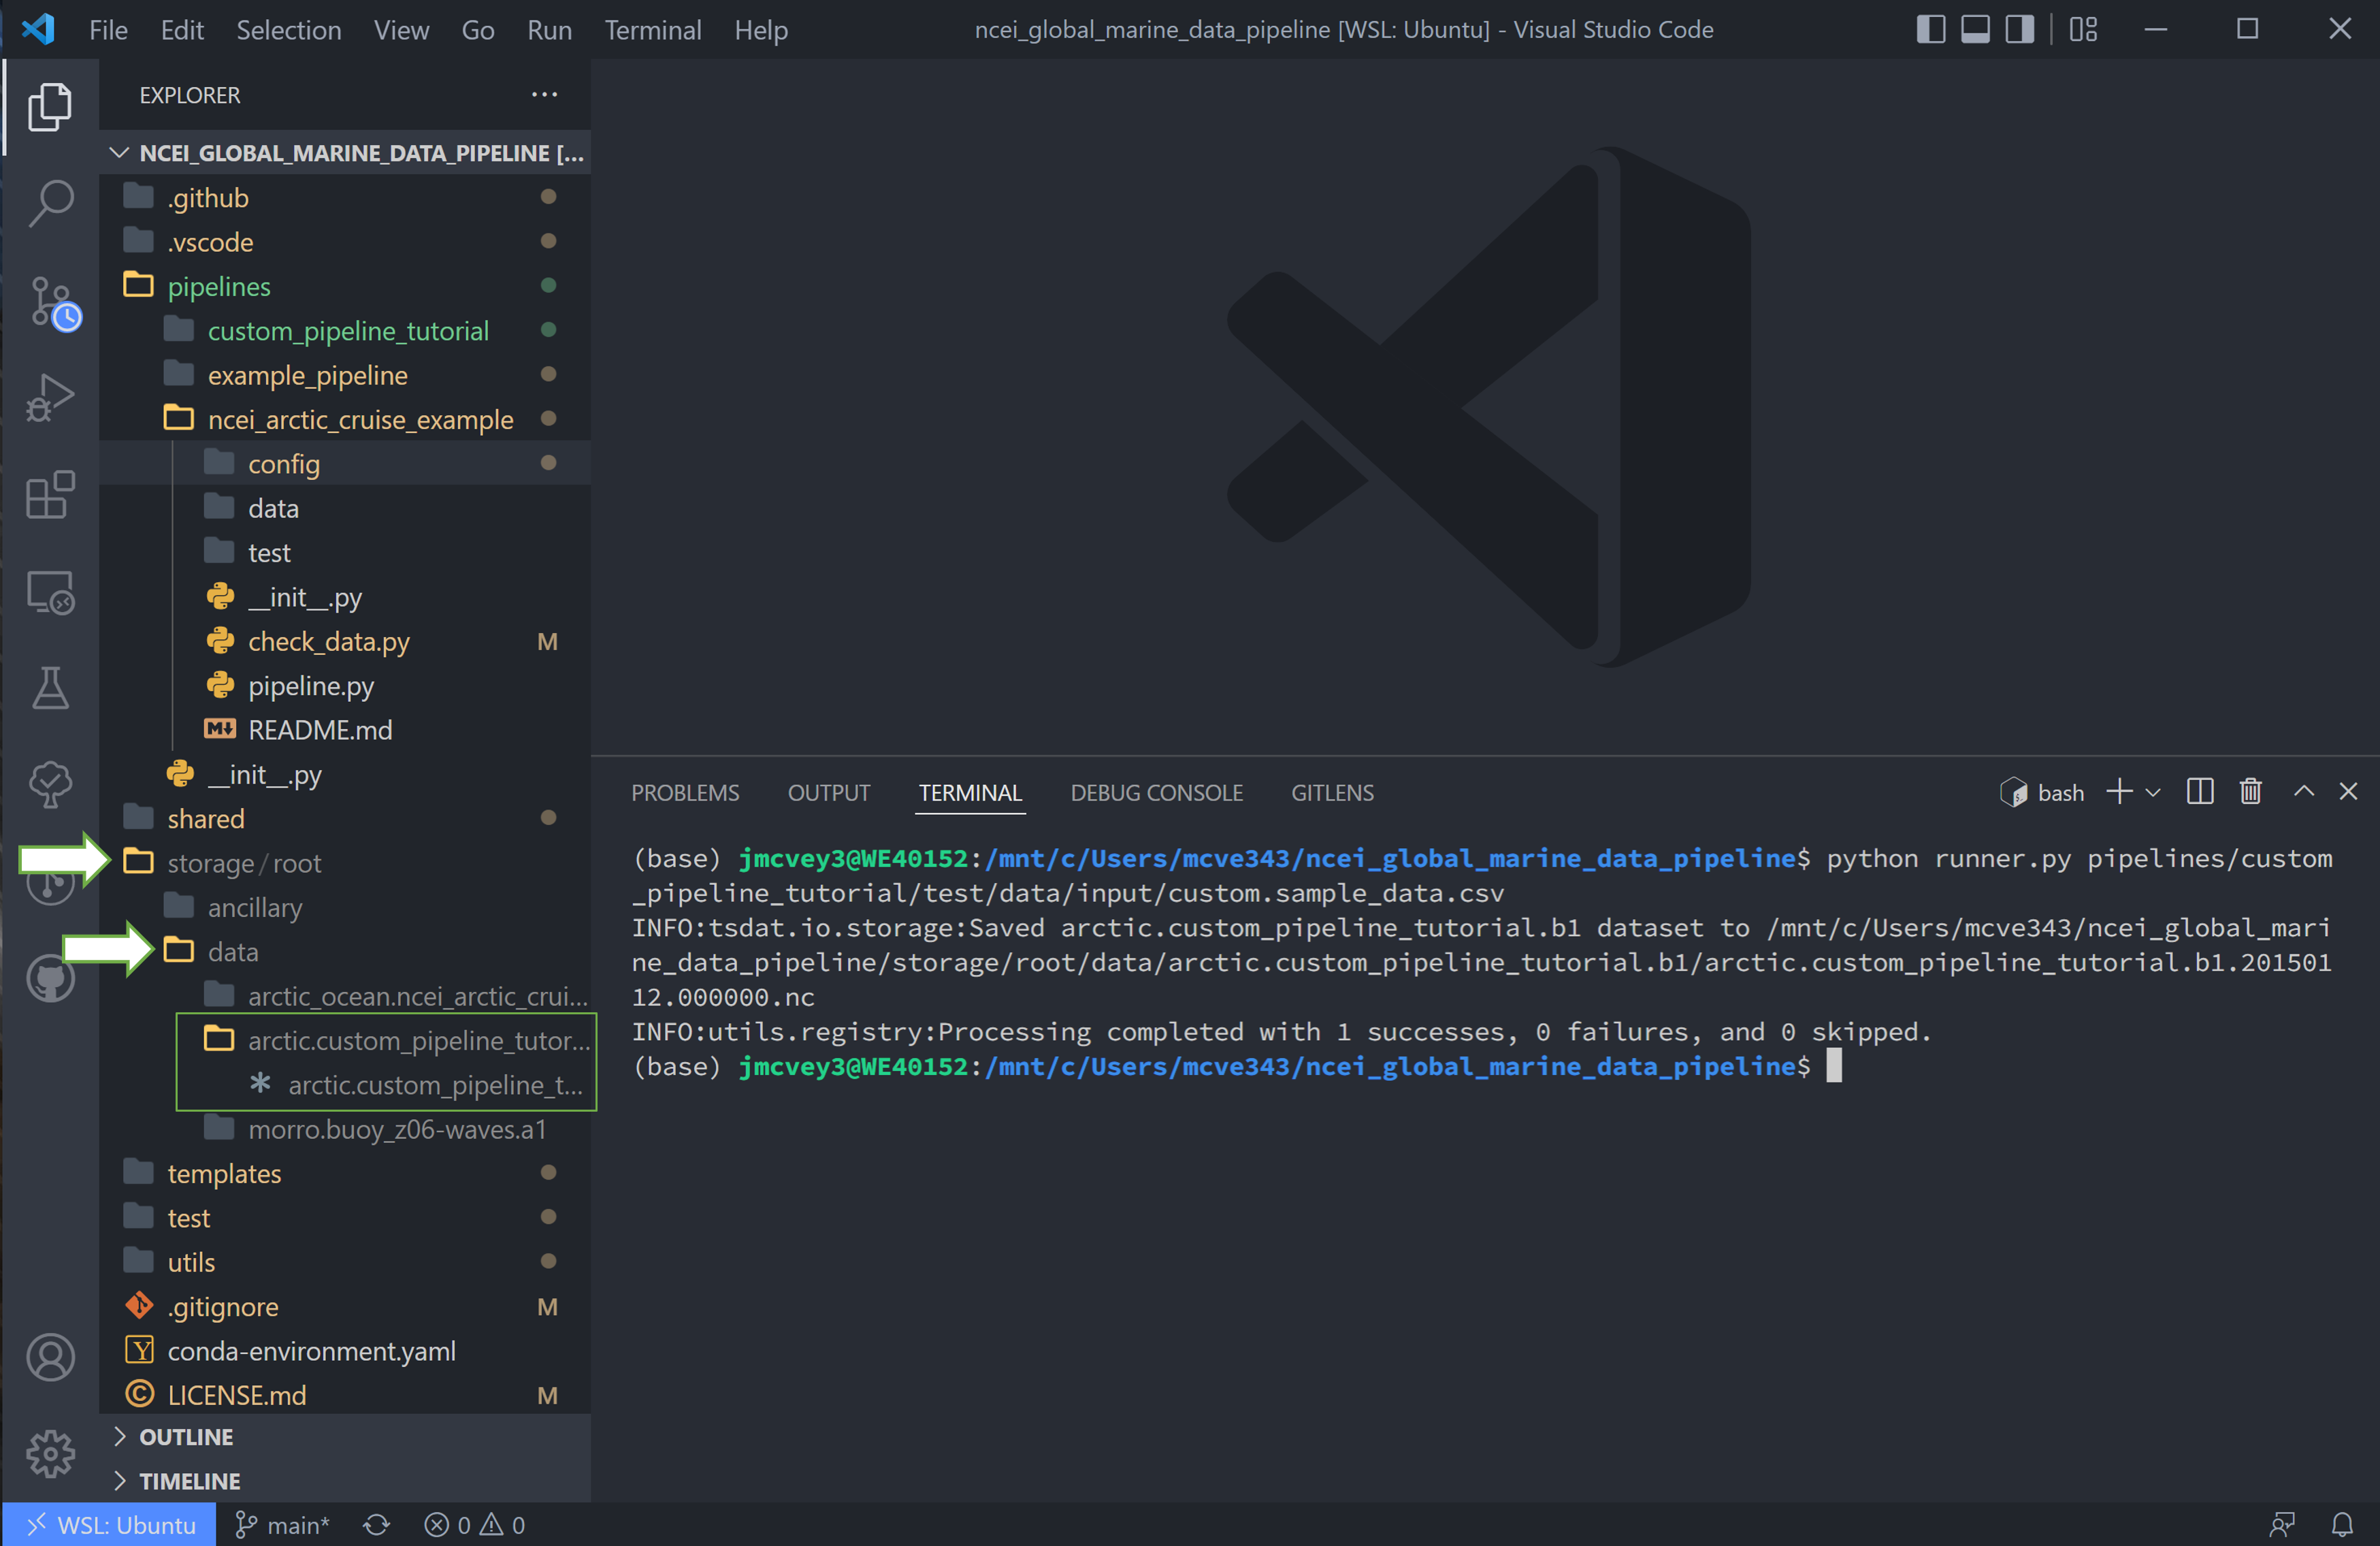
Finally we can run this pipeline. Open a terminal (
ctrl `) and run
python runner.py pipelines/<pipeline_name>/test/data/input/custom.sample_data.csv
Notes on Errors
Errors commonly ensue from data file located in incorrect directories, incorrect classname paths, and syntax errors. If you get an error, most of the time there is an error, missing or incorrect input in the .yaml files.
Common Errors:
1. KeyError [‘time’] – Time is typically the first variable tsdat looks for, so if it can’t load your dataset or if the time coordinate is not input correctly, this error will pop up. The failure load a dataset typically results from incorrect file extensions, regex patterns, or file path location.
2. Can’t find module “pipeline” – There are many modules and classes named “pipeline” in tsdat. This error typically refers to a classname specified in the config file, i.e.
pipelines.<pipeline_name>.qc.<custom_qc>orpipelines.<pipeline_name>.readers.<custom_reader>. Make sure this classname path is correct.3.
Check_<function>fails – Ensure all the variables listed under a quality managment group can be run through the function. For example, if I try to run the testCheckMonotonicon all “COORDS”, and one of my coordinate variables is a string array (e.g ‘direction’: [‘x’,’y’,’z’], this function will fail. Fix this by replacing “COORDS” with only numeric coordinates (e.g. ‘time’).4. If a QC handler doesn’t appear to be running on a variable, 1.) make sure it’s not being overridden by another in the same pipeline, 2.) make sure your custom QC tests are running on a single variable at a time and not affecting the entire dataset.
5. Pipeline is “skipped”. Make sure your regex pattern in pipeline.yaml matches your filename. There are regex file match checkers online for a sanity check.